How to Arrange Herbs in a Pot for Healthy, Thriving Growth
Wondering how to arrange herbs in a pot so they actually thrive? The key is to group herbs with similar sunlight and watering needs, give each plant enough space, and place taller herbs in the center or back with trailing ones near the edges. Whether you’re working with a small balcony or a big backyard, smart arrangement makes a big difference in how well your herbs grow, and how often you’ll be snipping fresh leaves for your kitchen.
Table of Contents
- 1 Why Proper Herb Arrangement Matters in Containers
- 2 Choosing the Right Pot for Your Herbs
- 3 Preparing the Soil Mix for Herb Pots
- 4 Selecting Compatible Herbs for Container Planting
- 5 Step-by-Step Guide to Arranging Herbs in a Pot
- 6 Expert Tips for Thriving Herb Pots
- 7 Conclusion: Mastering Herb Arrangement
- 8 Author
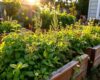
Why Proper Herb Arrangement Matters in Containers
Arranging herbs thoughtfully in a container is far more than a matter of aesthetics-it’s a key factor in their long-term health and productivity. Herbs have unique requirements for sunlight, water, and space, and planting them haphazardly can lead to a host of problems such as overcrowding, poor air circulation, and uneven access to nutrients and moisture. When herbs are arranged with intention, each plant receives the right amount of light and air, which helps prevent disease and encourages robust growth.
Additionally, grouping herbs with similar needs together makes it easier to care for them and reduces the risk of over- or under-watering. A well-organized pot also simplifies harvesting, allowing you to snip what you need without damaging neighboring plants. Ultimately, a thoughtfully arranged herb pot not only looks more attractive but also produces healthier, more flavorful herbs for your kitchen.
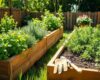
Choosing the Right Pot for Your Herbs
Size and Depth
Selecting the correct pot is the foundation of a successful container herb garden. The size and depth of your pot directly influence how well your herbs will grow. A pot that’s too small can restrict root development, leading to stunted growth and increased competition for water and nutrients. Aim for a container that’s at least 12 to 18 inches in diameter if you plan to grow multiple herbs together; this provides ample room for roots to spread out and for plants to reach their full potential.
The depth of the pot is equally important-herbs with deeper root systems, such as rosemary or sage, need a pot that’s at least 10 to 12 inches deep. For shallow-rooted herbs like thyme or basil, a slightly shallower pot may suffice, but extra depth is always beneficial for water retention and stability. Remember to leave some space at the top of the pot to make watering easier and prevent soil from spilling over.
Material and Drainage
The material of your pot can have a significant impact on the health of your herbs. Terra cotta and ceramic pots are excellent choices because they allow excess moisture to evaporate, reducing the risk of root rot. Wooden containers, such as cedar or redwood, are also durable and provide good insulation for roots. Metal pots can be stylish but may heat up quickly in direct sun, so use them with caution.
Regardless of material, drainage is non-negotiable. Make sure your pot has multiple drainage holes spaced evenly across the bottom to allow water to escape freely. Placing a layer of landscape fabric or a fine mesh over the holes before adding soil helps keep the soil in place while still permitting water to drain. Elevate your pot slightly with pot feet or bricks to further improve drainage and prevent water from pooling underneath, which can attract pests and promote disease.
Preparing the Soil Mix for Herb Pots
Well-Draining Soil
The quality and composition of your potting soil are crucial for the success of your herb garden. Herbs generally prefer a soil mix that drains quickly while retaining enough moisture for healthy root development. A balanced blend of equal parts topsoil, compost, and coarse sand is ideal for most Mediterranean herbs, as it mimics their native growing conditions. The topsoil provides structure, the compost supplies essential nutrients, and the sand ensures excellent drainage and aeration.
For an extra boost, sprinkle a thin layer of earthworm castings on top after filling the pot; this natural fertilizer slowly releases nutrients and encourages beneficial microbial activity. Avoid using heavy garden soil or clay-based mixes, as these can become compacted and suffocate roots. If you’re short on time, a high-quality commercial potting mix designed for herbs or vegetables, preferably one containing perlite or vermiculite, is a convenient and effective alternative.
Alternative Potting Mix
If you prefer a ready-made solution, look for a commercial potting mix that emphasizes drainage and aeration. Mixes containing peat moss, coconut coir, and perlite or vermiculite are particularly well-suited for container herbs. Peat moss and coir help retain moisture without becoming waterlogged, while perlite and vermiculite keep the soil light and fluffy, preventing compaction.
Some specialty herb mixes also include slow-release organic fertilizers, making it easier to maintain nutrient levels throughout the growing season. Before planting, moisten the mix slightly to make it easier to work with and to ensure even water distribution once your herbs are in place. Always check the pH of your soil mix-most herbs thrive in a slightly alkaline to neutral range (pH 6.0 to 7.5). Adjust the pH if necessary with lime or sulfur to create the optimal environment for your chosen herbs.
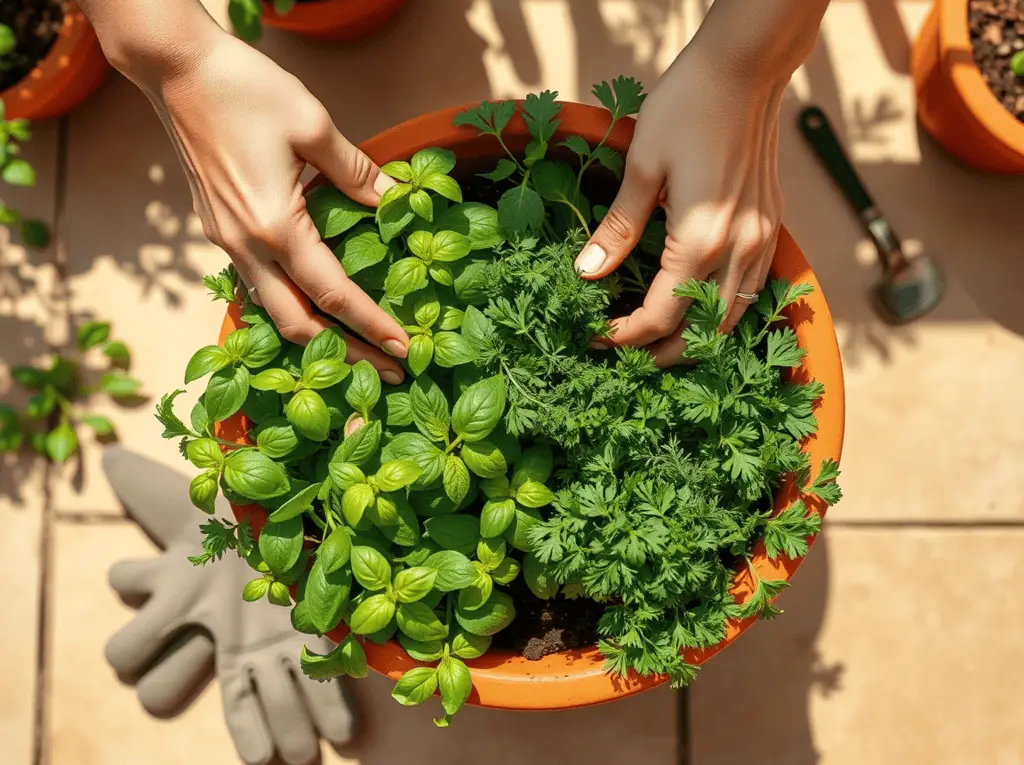
Selecting Compatible Herbs for Container Planting
Group Herbs by Water Needs
One of the most important considerations when planting multiple herbs in a single pot is their water requirements. Some herbs, such as rosemary, thyme, oregano, and lavender, are adapted to dry, well-drained conditions and can suffer if kept too moist. These drought-tolerant herbs thrive when grouped together, especially along the edges of the pot where soil tends to dry out more quickly.
On the other hand, moisture-loving herbs like basil, parsley, cilantro, and dill prefer soil that stays consistently damp but not soggy. Grouping these together in a separate pot or in the center of a larger container helps ensure they receive the moisture they need without risking root rot. Mint is a special case-it spreads aggressively and can quickly overtake other herbs, so it’s best grown in its own container or confined to a small section of a larger pot with a physical barrier to contain its roots.
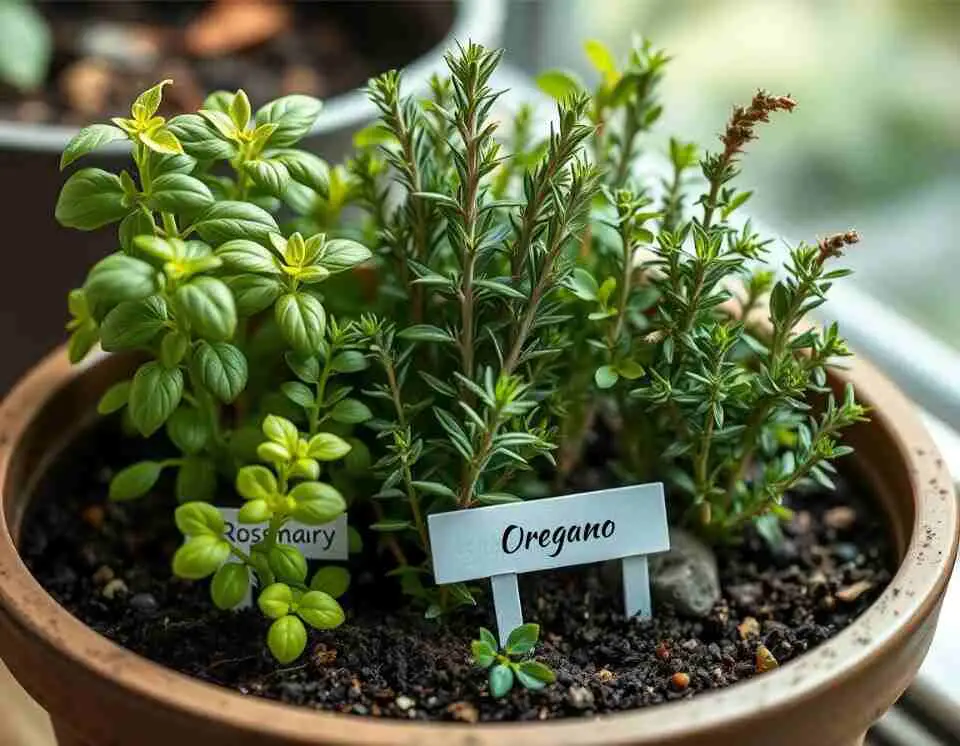
Consider Herb Growth Habits
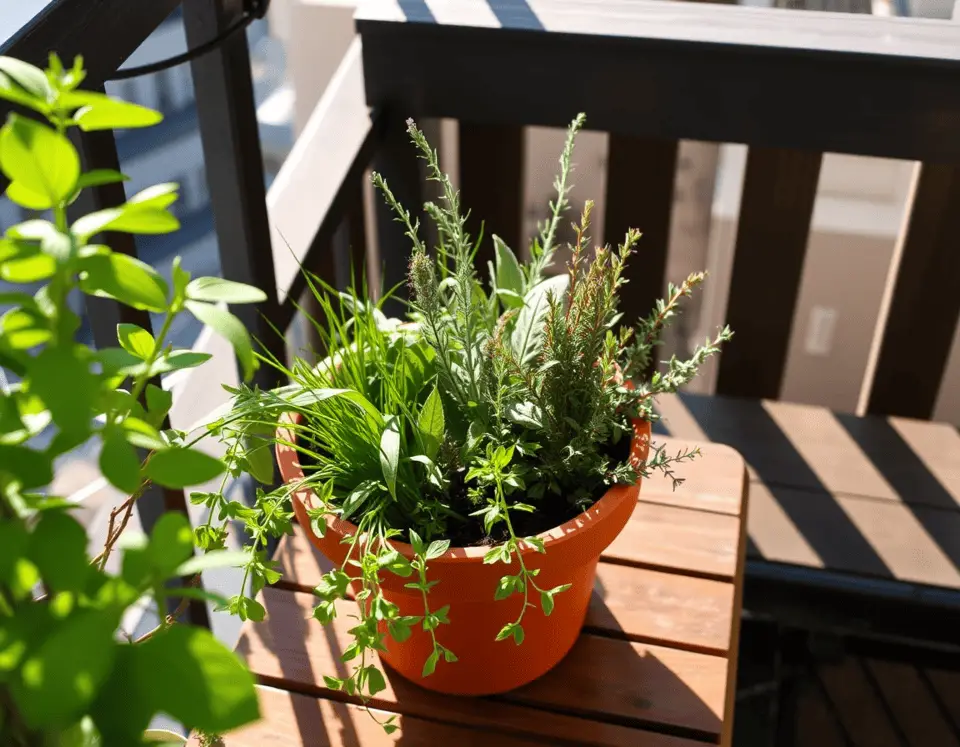
Understanding the growth habits of your chosen herbs is key to creating a harmonious and productive arrangement. Tall, upright herbs like dill, rosemary, or sage should be placed at the back of the pot if it will be viewed from one side, or in the center if the pot will be accessible from all sides. This prevents them from shading out shorter plants and allows for easy access during harvesting.
Medium-height herbs such as basil, chives, or marjoram can be arranged around the taller plants, creating a layered effect that maximizes space and sunlight exposure. Low-growing or trailing herbs like thyme, creeping oregano, or prostrate rosemary are best positioned at the front or along the edges of the pot, where they can spill gracefully over the sides and receive plenty of light. This tiered approach not only looks attractive but also ensures each plant has room to grow and thrive.
Examples of Successful Herb Combinations
Choosing the right combinations of herbs can make all the difference in your container garden’s success. For a Mediterranean-themed pot, try pairing drought-tolerant herbs like rosemary, thyme, and lavender, which all enjoy similar growing conditions and create a fragrant, visually appealing display. For a culinary-focused container, basil, parsley, and chives make an excellent trio, offering a variety of flavors for your kitchen while thriving together in moist, well-drained soil.
If you enjoy teas and desserts, consider combining lemon balm, stevia, and mint-just be sure to keep mint in check to prevent it from overtaking the other herbs. Sage and oregano are another classic pairing, both being hardy and relatively low-maintenance. Experiment with combinations based on your cooking preferences and available space, always keeping in mind the compatibility of their water and light requirements for the healthiest, most productive results.
Step-by-Step Guide to Arranging Herbs in a Pot
1. Select Your Container and Prepare It
Begin by choosing a container that suits both your space and the number of herbs you wish to grow. Make sure it has sufficient size and depth to accommodate the mature root systems of your chosen herbs, and check that there are enough drainage holes to prevent water from accumulating at the bottom. Before adding soil, line the bottom of the pot with a piece of landscape fabric or mesh.
This simple step helps keep soil from washing out through the drainage holes while still allowing excess water to escape freely. If you’re using a large or heavy pot, position it in its final location before filling it with soil to avoid having to move it later. Consider the aesthetics as well-choose a container that complements your home’s style, whether rustic, modern, or classic.
2. Fill with Well-Draining Soil Mix
Once your container is ready, fill it with your chosen soil mix, leaving about an inch of space at the top to make watering easier. Use your hands or a small trowel to break up any clumps and ensure the soil is evenly distributed. If you’re using a homemade mix, blend the topsoil, compost, and sand thoroughly to create a loose, crumbly texture that encourages root growth.
For extra nutrients, sprinkle a thin layer of earthworm castings or a slow-release organic fertilizer on the surface before planting. Lightly moisten the soil to help it settle and to give your herbs a good start. Avoid compacting the soil too much, as this can reduce drainage and make it harder for roots to spread.
3. Plan Your Herb Layout
Take a moment to visualize how your herbs will look and grow together in the pot. Arrange the pots or seedling trays on top of the soil before planting to experiment with different layouts. Place the tallest herbs at the back or center, depending on your viewing angle, to create a pleasing backdrop and prevent them from overshadowing smaller plants.
Medium-height herbs should be positioned around the taller ones, with the shortest or trailing varieties at the front or edges. Consider not only the height but also the spread and growth habit of each herb-leave enough space between plants to allow for airflow and easy harvesting. If you’re grouping herbs by water needs, cluster the drought-tolerant varieties together and keep moisture-loving herbs in a separate section or pot.
4. Plant and Space Appropriately
When you’re satisfied with your layout, begin planting each herb one at a time. Gently remove each plant from its nursery pot, taking care not to damage the roots. If the roots are tightly bound or circling the pot, tease them apart slightly to encourage outward growth. Dig a hole in the soil just deep enough to accommodate the root ball, then set the plant in place and fill in around it with soil.
Press the soil gently but firmly to eliminate air pockets and stabilize the plant. Space each herb according to its mature size-crowding them too closely can lead to poor air circulation and increase the risk of disease. Leave at least 4-6 inches between small herbs and 8-10 inches between larger ones.
5. Water and Position the Pot
After planting, water your herbs thoroughly to help them settle into their new home and to remove any remaining air pockets around the roots. Use a gentle stream of water to avoid washing away soil or damaging delicate seedlings. Place the pot in a location that receives at least 4-6 hours of sunlight per day, as most herbs thrive in bright, direct light.
If you’re growing herbs indoors, a south-facing windowsill or a spot under a grow light is ideal. Rotate the pot every few days to ensure even light exposure and balanced growth. For outdoor pots, consider the changing angle of the sun throughout the season and move the container as needed to maintain optimal light levels.
6. Maintain Your Herb Pot
Ongoing care is essential for keeping your container herb garden healthy and productive. Pinch back the tips of your herbs regularly to encourage bushier growth and prevent them from becoming leggy or flowering prematurely. Monitor soil moisture daily, especially during hot weather or if your pot is in a sunny location-herbs in containers dry out faster than those in the ground.
Water deeply but infrequently, allowing the top inch of soil to dry out between waterings for drought-tolerant herbs, and keeping the soil consistently moist for those that need more water. Fertilize sparingly, as most herbs don’t require heavy feeding; a light application of organic fertilizer every 4-6 weeks is usually sufficient. Remove any dead or yellowing leaves promptly to prevent disease and keep your herb pot looking its best.
Expert Tips for Thriving Herb Pots
- Avoid overcrowding: While it can be tempting to fit as many herbs as possible into a single pot, giving each plant enough space is crucial for healthy growth. Overcrowding reduces airflow, increases humidity, and makes it easier for pests and diseases to spread, all of which can compromise your herbs’ health and yield.
- Harvest often: Regularly snipping leaves and stems not only provides you with fresh herbs for cooking but also encourages your plants to produce new growth. Frequent harvesting prevents herbs from becoming woody or going to seed too quickly, keeping them lush and productive throughout the season.
- Use mulch or drip irrigation: Applying a thin layer of organic mulch, such as straw or shredded bark, helps retain soil moisture, suppress weeds, and regulate soil temperature. For larger containers, installing a simple drip irrigation system can make watering more efficient and reduce the risk of overwatering or underwatering.
- Watch aggressive herbs: Some herbs, like mint and oregano, have vigorous growth habits and can quickly dominate a container, crowding out their neighbors. To keep them in check, consider planting them in separate pots or using root barriers within a larger container to limit their spread and maintain a balanced arrangement.
Conclusion: Mastering Herb Arrangement
Arranging herbs in a pot is both a creative and practical endeavor that rewards you with fresh flavors and fragrant greenery all season long. By carefully selecting the right container, preparing a nutrient-rich and well-draining soil mix, and thoughtfully grouping compatible herbs according to their water and light needs, you’ll set the stage for a thriving herb garden that’s easy to care for and beautiful to behold.
Remember to consider the growth habits and mature sizes of your chosen herbs, and don’t be afraid to experiment with different combinations until you find what works best for your space and culinary preferences. With regular maintenance, mindful harvesting, and a little creativity, your container herb garden will flourish, providing you with a steady supply of fresh, flavorful herbs and a touch of natural beauty wherever you choose to place it.
This expanded guide is designed to deliver original, actionable, and trustworthy advice, ensuring your herb container garden is both successful and enjoyable. Happy gardening, and may your pots overflow with health and flavor!
Images created using PicLumen.