How To Grow Bay Leaf Plant At Home? (Step-By-Step)

Bay leaf plant is a popular spice used in many dishes. It is also used for medicinal purposes. Did you know that you can grow bay leaf plant at home?
In this article, we will give you a step-by-step guide on how to grow bay leaf plant at home. The process is very simple and easy, anyone can do it, and it doesn’t take a lot of time or money.
Table of Contents
- 1 Step 1: Choose a Suitable Location
- 2 Step 2: Soil Requirements
- 3 Step 3: Planting
- 4 Step 4: Watering and Sunlight
- 5 Step 5: Pruning and Mulching
- 6 Step 6: Harvesting
- 7 Caring For Bay Laurel Plant
- 8 Pest and Diseases that Affect Bay Laurel
- 9 How long does a Bay Leaf tree take to grow?
- 10 Can you use Bay Leaves straight from the tree?
- 11 Hardiness zones for Bay Leaf plants
- 12 Can you keep a Bay Tree indoors?
- 13 Conclusion
- 14 Author
Step 1: Choose a Suitable Location
Bay leaf plants are easy to grow and can be planted in containers or in the ground. They prefer full sun and well-drained soil, but will tolerate a wide range of conditions. It does not need much care beyond occasional watering when it is established (after about six months).
Step 2: Soil Requirements
Growing bay laurel is a rewarding experience for those who love the fragrant leaves and use them in cooking. But it can be difficult to grow if you don’t know what soil type they prefer.
Bay Leaf Plant (Laurus nobilis) does best in soil that is well-drained. Amend your soil with compost or peat moss to help improve drainage.
Step 3: Planting
Bay Leaf Plant can be grown from seed or from a cutting.
- Growing From Seed:
To grow from seed, sow the seeds in a pot and cover them with 1/4 inch of soil. Keep the soil moist and give the plants plenty of sun. The plants will germinate in 2-3 weeks.
- Growing From Cutting:
To grow from a cutting, take a stem from a healthy bay leaf plant and cut it into a 3-inch piece. Remove the leaves from the bottom 2/3 of the stem and dip the end of the stem in a rooting hormone. Plant the stem in a pot filled with moist potting soil and give it plenty of sun. The plant will begin to root in 2-3 weeks.
Step 4: Watering and Sunlight
Bay leaves can be grown indoors or outdoors, depending on your climate zone. If you’re growing them indoors, make sure they have plenty of sunlight as well as good drainage and plenty of water to keep their soil moist but not wet.
They also need plenty of sunlight. Place your bay leaf plant in a spot where it will get at least six hours of sunlight each day.
Step 5: Pruning and Mulching
The bay leaf plant is a beautiful addition to any garden. However, these plants require some special care in order to thrive and look their best. Pruning and mulching are two important practices that should be followed when caring for a bay leaf plant.
Pruning helps to keep the plant healthy and looking its best by cutting off old or damaged branches from the stem or trunk. First, it’s important to know how often the plant needs pruning.
When the leaves of the bay tree start looking unhealthy or yellowed from old age, then it’s time for a trimming session. In general, you’ll want to cut the oldest, brownest leaves from the base of the plant first.
Then you’ll want to take a small pair of shears and carefully trim any long stems that have been rubbing against each other and causing damage. This will also remove some of the more damaged branches on your bay tree.
Always be careful when pruning so as not to do too much at once, or you may end up having a dead plant on your hands! In addition to occasional pruning sessions, it is important to mulch your bay leaf plant.
Mulching helps retain moisture in the soil and protect the roots from extreme temperatures. Some people believe that a bay leaf plant should be repotted every year, but this is not necessary if you mulch it regularly and prune as needed.
Pruning should be done when the plant is young, and should be done annually thereafter. Mulching can be done either annually or every other year, depending on the climate.
Step 6: Harvesting
Bay leaves are harvested by hand, using clippers or scissors to snip the leaves from the stem. The leaves are then dried in a shady, well-ventilated area. Harvesting bay leaves is important because it’s crucial for preserving flavor and aroma in recipes.
Bay leaf oils can be volatile when exposed to air, so drying them in a shady place will help preserve their flavors. It’s best to harvest bay leaves after they’ve reached maturity, but before they start losing their potency.
Caring For Bay Laurel Plant
Bay laurel is a beautiful evergreen plant that can be used as a landscape tree or a houseplant. Here are some tips for caring for bay laurel:
- First and foremost, it’s important to water your bay leaf plant every day, unless it has recently been raining or if the soil in the pot feels moist when you touch it.
- When watering your plant, make sure not to overwater because doing so can cause root rot and yellowing of the leaves.
- Place the pot on a saucer filled with gravel or rocks to provide good drainage and allow excess water to drain away.
- Bay laurel needs plenty of sunlight. Place it in a sunny spot where it will get at least six hours of indirect sunlight each day.
- Bay laurel needs to be fertilized once a month with a balanced diluted fertilizer.
- Mulch around the base of the tree to help keep the soil moist.
- Bay laurel can be susceptible to pests and diseases, so keep an eye out for any problems and treat them quickly.
Pest and Diseases that Affect Bay Laurel
Pests and diseases that affect bay laurel are aphids, scale insects, and fungal diseases. Aphids are these tiny, soft-bodied insects that suck sap from herb plants. They can cause leaves to eventually curl and begin to turn yellow.
Scale insects are small, hard-bodied insects that attach themselves to leaves and stems. These insects can cause leaves to turn yellow and fall off. Fungal diseases can cause leaves to turn brown and fall off.
To control pests and diseases, you can use insecticides, miticides, and fungicides. Insecticides are chemicals that kill insects. Miticides are chemicals that kill mites. Fungicides are chemicals that kill fungi. You can buy these chemicals at garden centers.
You can also control pests and diseases by using cultural methods. Cultural methods include planting resistant varieties, planting in sunny locations, watering correctly, and using proper fertilization. Planting resistant varieties helps to reduce the number of pests and diseases that affect plants.
Planting in sunny locations helps to dry out leaves and stems, which reduces the chances of pests and diseases. Watering correctly helps to keep plants healthy, which makes them less susceptible to pests and diseases.
Proper fertilization provides plants with the nutrients they need to grow healthy and strong, which also helps to reduce the chances of pests and diseases.
How long does a Bay Leaf tree take to grow?
A bay leaf tree can take anywhere from two to four years to grow, but it can take longer in colder climates or poor soil conditions.
Once the tree is established, it can grow up to 12 feet tall and has a lifespan of about 20 years. The leaves can be harvested when the tree is about three years old.
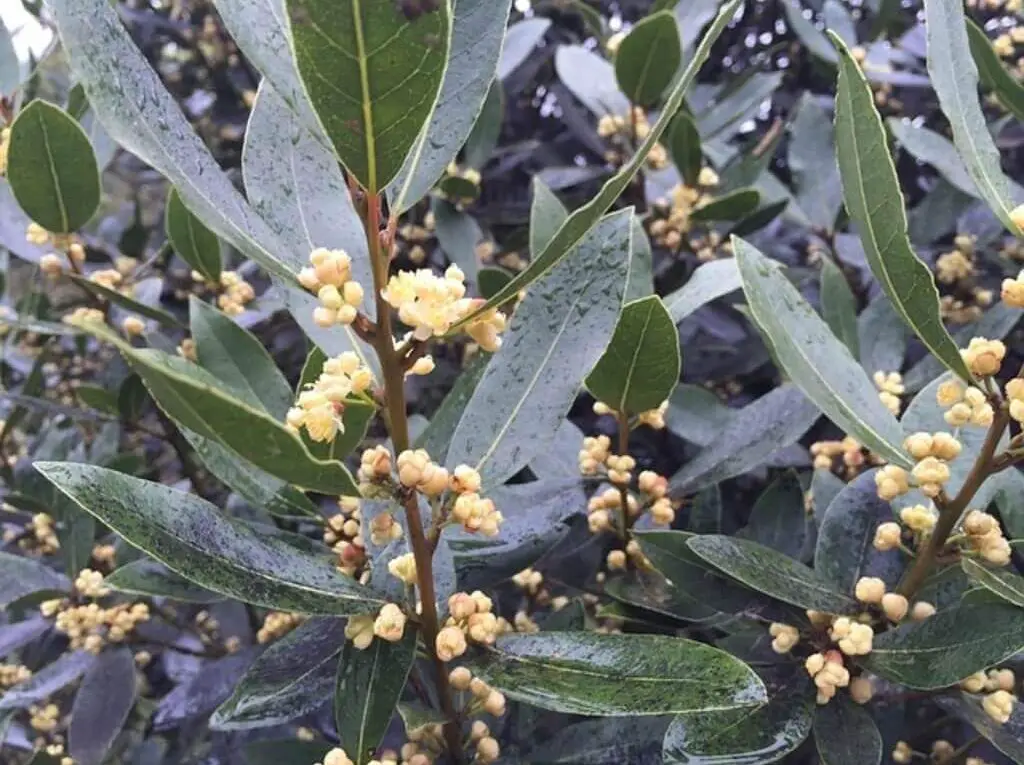
Can you use Bay Leaves straight from the tree?
Yes, you can use bay leaves straight from the tree. However, you should only use the leaves from the Laurus nobilis, or sweet bay, tree.
The leaves from other bay trees may be poisonous.The leaves of the bay laurel tree can be used fresh or dried. The leaves are used to flavor food, and are also used in herbal medicine.
Hardiness zones for Bay Leaf plants
Bay Leaf Plants are hardy in zones 8-11. In colder climates, the plants should be grown in a pot and brought indoors during the winter.
Can you keep a Bay Tree indoors?
Bay trees will do well inside if you provide them with the right environment.The first thing you need is a pot that has drainage holes at the bottom; this way water won’t collect in the pot and rot your tree roots. You should also use a potting mix that has plenty of compost.
Conclusion
Growing bay leaf plant at home is easy. If you follow the steps in this guide, you will be able to grow a healthy bay leaf plant in no time.
Related Post:
- Most Common Herbs And Spices Used In British Cuisine
- 11 Most Common Herbs And Spices Used In Italian Cuisine