
How To Grow Cardamom At Home? (Step-By-Step Guide)

Cardamom is a spice that is often used in Indian cuisine. It has a unique flavor that can add depth to your dishes. Did you know that you can also grow cardamom at home?
Yes It’s true! And, In this article, I will show you how to grow Cardamom at home with this easy step-by-step guide.
Table of Contents
What is Cardamom?
Cardamom is a spice native to India, that comes from a plant known as the ginger family. This perennial plant grows to about 2-4 feet in height in an indoor setting, and between 6-15 feet in height outdoors, and grows from a rhizome.
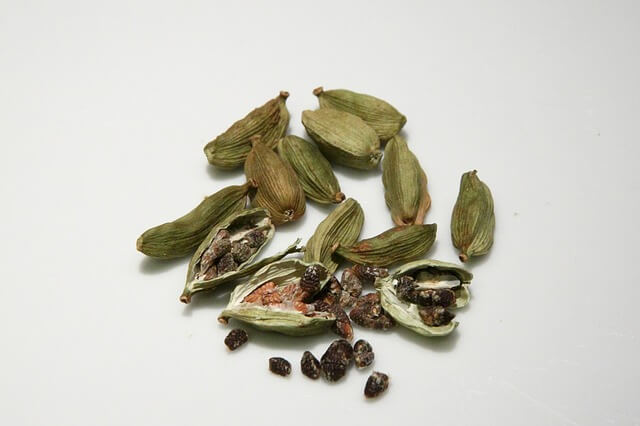
The leaves are lance-shaped and the flowers are small and white. The fruit of the plant is a pod that contains small, black seeds.
Cardamom has a pungent, spicy flavor and is used to flavor food and tea. It is also used as a medicinal herb to treat stomach problems and respiratory disorders.
History
Cardamom is a spice that has been used for centuries in both food and medicine. The earliest record of cardamom use comes from India, where it has been used for over 4,000 years.
It was also used in Ancient Greece and Rome for both culinary and medicinal purposes. Today, cardamom is still used extensively in Indian cuisine and is also popular in Scandinavian and Middle Eastern cuisine.
Propagation
Cardamom is a perennial plant that can be propagated by seeds or division. Seeds can be collected from the pods after the pods have dried, and the seeds have been released.
The seeds can be planted in a well-drained soil and will germinate in about four to five weeks. The plants can also be propagated by division. The plants can be divided in the spring or early summer after they have flowered.
How to Propagate Cardamom by Division?
Step 1: Choose a healthy cardamom plant.
Step 2: Cut the stem of the plant just below a node.
Step 3: Remove the leaves from the bottom 2/3 of the stem.
Step 4: Place the stem in water and change the water every other day.
Step 5: Roots will form in 2-3 weeks and the plant can be transplanted.
How To Grow Cardamom At Home In Pots?
Cardamom can be grown at home in pots. The plants need a warm, sunny location and well-drained soil. Seeds can be planted in the spring or during the fall.
The plants will need water and fertilization, but be careful not to over water them as they are prone to root rot. The pods can be harvested when they are ripe, and the seeds can be dried and stored for later use.
1. Choose a pot that is at least six inches deep and has drainage holes.
A pot that is at least six inches deep and has drainage holes is ideal for growing Cardamom. The pot should be large enough to accommodate the plant’s roots and allow for ample drainage. I would recommend these pots.
The drainage holes help to prevent the roots from becoming waterlogged, which can damage or kill the plant.
2. Fill the pot with a soil mix that is well draining.
A soil mix that drains well is important for plants that require well-drained soil, such as herbs and succulents. A soil mix that is heavy in clay will not drain well and can lead to root rot in plants.
A soil mix that is heavy in sand will not hold moisture well and can also lead to root rot in plants. A well-draining soil mix can be created by combining a third part of sand, a third part of compost, and a third part of soil.
You can save yourself sometime by using a rich humus soil that is just a bit of acidic pH range of 5.5-6.5 like this one available on Amazon.
3. Sow the cardamom seeds in the soil and cover them with a thin layer of soil.
Sow the cardamom seeds in the soil and cover them with a thin layer of mulch or even grass. Water the area well and keep the soil moist until the seeds germinate.
Once the plants are a few inches tall, you can begin to fertilize them with a light application of organic high nitrogen fertilizer.
4. Water regularly and keep the soil moist.
Water is essential for plant growth. Cardamom plants should be watered regularly, and the soil kept moist. If the soil is too dry, the cardamom will not grow well. If the plants are not watered frequently enough, they will wilt and die, and if they are watered too much, the roots will rot.
5. Cardamom plants will begin to grow within a few weeks.
Cardamom plants will begin to grow within 30-45 days. The plants will need plenty of water and sunlight. The plants will grow quickly and will need to be trimmed often.
6. When the plants are about six inches tall, transplant them to a larger pot.
Once the plants are about six inches tall, transplant them to a larger pot. This will give them more room to grow and allow the roots to spread out.
Be sure to use a pot that is large enough for the plants to grow in, and make sure the pot has drainage holes, so the plants can drain properly. One that I highly recommend is this one on Amazon.
Growing Tips
1. Cardamom is a perennial plant that can be grown outdoors in USDA zones 9 through 11.
2. In cooler climates, it can be grown indoors as a houseplant.
3. Cardamom plants prefer full sun or partial shade and well-drained soil.
4. Amend the soil with compost or organic matter before planting.
5. Water regularly, but avoid over-watering as this can lead to root rot.
6. Fertilize monthly with a balanced organic high nitrogen fertilizer.
7. Harvest the pods when they are green and still tender.
8. When harvesting, dry the pods for 6-7 days in a dark, dry place.
9. Store the pods in an airtight container.
Where to Buy Seeds or Starter Plants
When it comes to purchasing options for growing cardamom, there are a few different avenues you can take. One option is to purchase cardamom seeds and grow them yourself. This can be a fun and rewarding project, but it does require a fair amount of time and effort.
If you’re not interested in growing your own cardamom, you can also purchase starter plants from a garden center or online retailer. Be sure to do your research before making a purchase, as not all varieties of cardamom are suited for growing in the home garden.
Managing Pests and Disease
Cardamom is also used to manage pests and diseases. Purchase cardamom plants from a reputable nursery. Make sure the plants are well-established and have a healthy root system. Inspect the plants for signs of pests or disease. If the plants are infected, discard them and purchase new plants.
Harvesting
Cardamom is an annual herb that is harvested in the late summer or early fall. The pods are harvested when they are green and before they turn brown. The pods are then dried in the sun or in a dehydrator. Dry the pods for 6-7 days in a dark, dry place. Store the pods in an airtight container in a cool, dark place.
Preserving
Cardamom is a popular spice that is used in both sweet and savory dishes. It has a unique flavor that is difficult to replicate. Cardamom is a delicate herb and should be stored in a cool, dark place. It can be preserved by freezing it.
Cardamom can be frozen by placing the pods in an airtight container and freezing them for up to 6 months. The pods can also be frozen by placing them in a vacuum-sealed bag and freezing them for up to 12 months.
Cardamom can also be preserved by canning it. The pods can be canned by placing them in a hot water bath for 10 minutes. The pods can also be canned by placing them in a pressure cooker for 5 minutes at 15 psi.
Cardamom can also be preserved by drying it. The pods can be dried by spreading them out on a baking sheet and baking them at 150 degrees Fahrenheit for 12 hours. The pods can also be dried by spreading them out on a dehydrator and dehydrating them at 115 degrees Fahrenheit for 12 hours.
Related Post: 34 Herbs and Spices that Start with the Letter C