How to Grow Lovage: Expert Tips for a Thriving Plant!
If you want to add a towering perennial to your garden, mastering how to grow lovage is a highly rewarding project that completely elevates your culinary efforts. This massive herb requires a solid understanding of its structural demands and environmental preferences to thrive. Proper execution of cold chilling, soil preparation, and precise harvesting ensures a vibrant yield year after year.
This detailed guide provides exact dimensions, verified scientific truths, and community-tested methods to transform your plot into a highly productive herb sanctuary. By strictly following these horticultural blueprints, you can avoid common pitfalls and maximize your harvest. You will discover exactly what it takes to cultivate this remarkable plant successfully.
Location and Soil Setup
Lovage thrives best in a permanent spot receiving at least six hours of direct sunlight daily. Position your outdoor beds to capture bright morning sun and filtered afternoon light to guarantee robust cellular development. Select a south-facing wall that offers wind protection while maximizing light exposure for this towering perennial.
Hobbyists over on the Houzz gardening boards warn that growing this massive plant entirely indoors in standard pots is a guaranteed path to failure. Real-world logs reveal that lovage suffers from severe etiolation and weak stems when deprived of natural solar radiation and deep soil profiles. You must provide a robust outdoor environment for long-term success.
Soil preparation requires a highly specific structural blueprint to support the massive taproot system. Dig your beds to a depth of at least eighteen inches, incorporating a ratio of sixty percent native loam to forty percent rich compost. This exact ratio ensures rapid drainage while retaining enough baseline moisture to keep the deep roots cool.
Spacing and Planting Guidelines
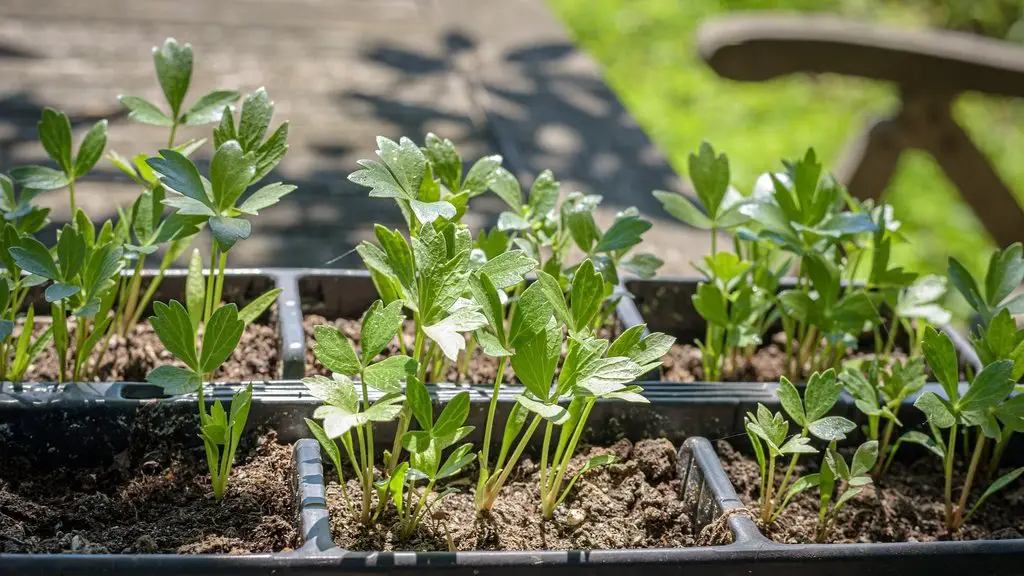
Before you ever touch the soil, you must execute a strict cold stratification mandate to break embryonic seed dormancy. Place your seeds in a refrigerator for a minimum of two weeks prior to sowing. This chilling process mimics winter conditions and dramatically increases your overall germination success rates.
When sowing, you must strictly follow the light-germination rule. Press the seeds gently onto the damp soil surface completely uncovered, as they absolutely require light to sprout. A common myth suggests that large plants need their seeds buried deep for protection, but burying lovage seeds will actually suffocate them and prevent germination entirely.
Backyard growers on r/herbgardening frequently document devastating mildew outbreaks when these massive plants are crowded together. You must implement a strict mature spacing blueprint of 32 to 36 inches apart minimum. Never use cramped spacing or indoor humidity domes for adult outdoor plots, as mature lovage easily reaches six feet in height and requires massive airflow.
Watering Protocols
Lovage originates from moist meadow environments and demands consistent hydration without sitting in stagnant water. You should water the base of the plant deeply at least twice a week during the peak summer months. Delivering water directly to the soil level prevents fungal spores from splashing onto the broad lower leaves.
Real-world testing logs from online planting communities reveal that inconsistent watering leads to bitter, tough foliage. To prevent this, apply a three-inch layer of organic hardwood mulch around the base of the plant. This structural barrier regulates soil temperatures and traps essential moisture during severe heat waves.
Always check the soil moisture at a depth of four inches before adding more water. If the soil feels completely dry at that depth, initiate a slow, deep soaking session. This method forces the taproot to grow downward in search of moisture, creating a highly resilient and drought-tolerant plant structure.
Fertilizing and Nutrition
Because lovage produces an immense amount of green vegetative growth, it requires a robust and steady supply of organic nutrients. Apply a balanced organic granular fertilizer at the beginning of the spring growth cycle. You must gently work this feed into the top two inches of the surrounding soil to avoid burning the shallow feeder roots.
A common workaround shared across GardenWeb tracking threads suggests utilizing an unorthodox backyard hack to strengthen the massive, hollow stalks. Growers steep leftover banana peels in a sealed bucket of water for three days to create a highly concentrated potassium tea. Applying this diluted liquid feed directly to the root zone once a month prevents the towering stems from snapping in heavy winds.
Avoid using synthetic nitrogen fertilizers that force rapid, weak, and flavorless cellular expansion. Instead, side-dress the plant with aged mushroom compost mid-season to provide a slow release of complex minerals. This natural feeding strategy ensures the leaves remain tender and highly aromatic for your culinary applications.
Harvesting and Storage
You can begin harvesting lovage leaves as soon as the plant reaches eighteen inches in height. Always snip the stems from the outside of the plant to encourage dense, bushy growth from the central crown. Regular harvesting prevents the herb from flowering prematurely, which forces the plant to direct its energy into producing more tender foliage.
The general consensus among seasoned culinary gardeners highlights the importance of morning harvests for peak flavor. Cut the stalks right after the morning dew dries, as this is when the essential oil concentration peaks within the cellular walls. You can use the fresh leaves immediately to impart a rich celery flavor to soups, stews, and potato dishes.
For long-term storage, standard drying methods often strip away the delicate volatile oils. Instead, employ an expert culinary processing method by blending fresh lovage leaves with a neutral oil to create an emerald green paste. Freeze this dense paste in standard ice cube trays for an instant, flavor-packed broth base that lasts completely intact through the winter months.