How to Grow Calendula from Seed: A Step-By-Step Guide!
Looking to add some bright and cheerful blooms to your garden? Look no further than Calendula! In this article, we’ll guide you through the process of how to grow Calendula from seed with simple step-by-step instructions.
Whether you’re a seasoned gardener or a first-time planter, we’ve got you covered. Get ready to cultivate a stunning display of sunny flowers and impress your friends and neighbors with your green thumb skills.
Table of Contents
- 1 What is Calendula?
- 2 Why Should You Grow Calendula from Seed?
- 3 How to Grow Calendula from Seed
- 3.1 1. What You Need to Get Started
- 3.2 2. When to Plant Calendula Seeds: The ideal time of year for planting
- 3.3 3. How to Prepare the Soil
- 3.4 4. Planting the Seeds
- 3.5 5. Providing Adequate Water
- 3.6 6. Ensuring Proper Light and Temperature Conditions
- 3.7 7. How to Care for Calendula Plants
- 3.8 8. Dealing With Pests and Diseases
- 3.9 9. Harvesting and Storing Your Calendula
- 4 Conclusion
- 5 FAQs About Growing Calendula
- 5.1 How do I plant Calendula seeds?
- 5.2 How much water do Calendula plants need?
- 5.3 When do Calendula plants bloom?
- 5.4 How do I deadhead Calendula plants?
- 5.5 How do I fertilize Calendula plants?
- 5.6 What pests and diseases affect Calendula plants?
- 5.7 Can I grow Calendula in containers?
- 5.8 How do I propagate Calendula plants?
- 6 Author
What is Calendula?
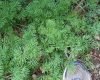
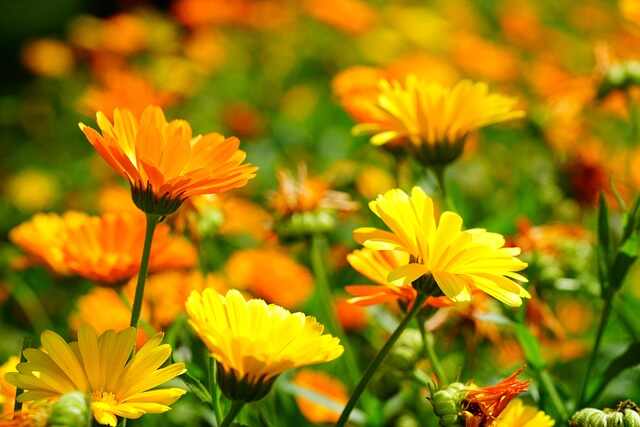
Calendula (calendula officinalis), more commonly known as pot marigolds, are flowering annuals that are part of the daisy family. They are native to the Mediterranean and have become popular garden plants around the world.
Calendula have bright yellow and orange flowers that can bring a cheerful burst of color to any garden. They are fairly easy to grow from seed and can be planted in both containers and flower beds.
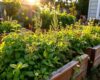
Why Should You Grow Calendula from Seed?
Growing calendula from seed can be very rewarding and is a great way to add a splash of color to your garden. Not only is calendula an attractive flower, but it’s also very easy to grow. It’s a hardy flower that can withstand a variety of climates and is relatively low-maintenance.
Calendula is also an edible flower, which makes it a great choice for adding to salads and other recipes. Growing your own calendula from seed means you can enjoy the beauty of this flower in your garden, as well as the flavor it adds to your recipes.
With a little bit of care, you can have a beautiful crop of calendula in your garden.
How to Grow Calendula from Seed
1. What You Need to Get Started
If you’re ready to start growing Calendula from seed, then you’ll need a few supplies. First and foremost, you’ll need to get your hands on some Calendula seeds. You can usually find these in the seed aisle at your local garden center or online.
You’ll also need some potting soil, pots or containers, and a watering can. If you’re planting outdoors, you’ll need a trowel or shovel to prepare the soil.
Finally, you’ll also want to have some fertilizer on hand to keep your plants healthy and happy. With these supplies in hand, you’ll be ready to get started!
Table: Supplies Needed to Grow Calendula from Seed
| Supplies Needed | Description |
|---|---|
| Calendula seeds | Can be purchased at a local garden center or online |
| Potting soil | Needed to provide a nutrient-rich environment for growth |
| Pots or containers | Used for planting the seeds |
| Watering can | Used for watering the plants |
| Trowel or shovel | Needed for outdoor planting to prepare the soil |
| Fertilizer | Helps to keep the plants healthy and thriving |
2. When to Plant Calendula Seeds: The ideal time of year for planting
When it comes to planting calendula seeds, timing is everything. Calendula is a cold-hardy annual, meaning that it is best planted in the cooler months of the year. The ideal time to plant calendula is in the late winter or early spring, when the soil is still cool and the risk of frost is minimal.
Planting after the last frost will ensure the best germination rate and the healthiest plants. If you’re planting in the summer, you’ll want to wait until the temperature has dropped and the soil has cooled off.
Either way, you’ll want to ensure that the soil temperature is at least 40 degrees Fahrenheit or higher.
Table: Best Time to Plant Calendula Seeds
| Time of Year | Ideal Planting Time |
|---|---|
| Late winter | Soil is still cool, minimal frost risk |
| Early spring | Best germination rate |
| Summer | Wait until temperature drops, soil cools |
3. How to Prepare the Soil
Preparing the soil is critical for successful calendula growth. To begin, you’ll want to make sure that the soil is well-draining and that it has a pH level of between 6.5 and 7.5. This will ensure that your calendula plants get the nutrient uptake they need to thrive.
To achieve the ideal soil pH, you’ll want to add compost or well-rotted manure to the soil to help balance it out.
Additionally, you’ll want to mix in a slow-release fertilizer to give your calendula plants a good boost of nutrients. Once you’ve got the soil properly prepared, you can move on to planting your calendula seeds.
Table: Preparing the Soil for Calendula Growth
| Steps for Soil Preparation | Description |
|---|---|
| Ensure soil is well-draining | Allows for proper water absorption and prevents root rot |
| Soil pH level | Between 6.5 and 7.5 for proper nutrient uptake |
| Add compost or manure | Balances soil pH and provides nutrient-rich environment |
| Mix in slow-release fertilizer | Boosts nutrient levels and promotes healthy plant growth |
4. Planting the Seeds
Planting calendula seeds is a simple process that can get you started on your journey to enjoying the beauty of this flower in your garden. To plant your calendula seeds, you’ll need to prepare your soil by digging a shallow hole.
Fill the hole with compost or a light soil mix and then place the seeds on top. Cover the seeds with a thin layer of soil and then water the area. You don’t need to cover the seeds too deeply, as calendula prefers a light covering.
Once you’ve planted your seeds, you’ll need to provide adequate water, light, and temperature conditions for the seeds to germinate.
With a little bit of love and care, your calendula seeds will soon start to sprout and you’ll be on your way to enjoying the beauty of this flower in your garden.
Table: Planting Calendula Seeds
| Steps for Planting Calendula Seeds | Description |
|---|---|
| Dig a shallow hole | Preparing soil for planting |
| Fill hole with compost or soil mix | Nutrient-rich environment for seed germination |
| Place seeds on top of soil | Proper spacing and planting depth |
| Cover with a thin layer of soil | Light covering for optimal growth |
| Water the area | Adequate moisture is key to germination and growth |
| Provide adequate light and temperature | Seeds require specific conditions for germination |
5. Providing Adequate Water
Once your calendula seeds are planted and have sprouted, regular irrigation is essential to ensure they grow and thrive. The soil should be kept moist, but not wet—too much water can be detrimental.
To avoid over-watering, check the soil with your fingers before you water and only water if it feels dry.
If you’re not sure, it’s better to err on the side of caution and hold off on watering until the soil is dry.
You can also use a moisture meter to check the soil moisture accurately. If your calendula plants are growing in containers, you may need to water them every day or two, depending on the weather and how much sunshine the plants are getting. In general, during the heat of summer, your calendula plants may need to be watered twice a day.
Table: Watering Guidelines for Calendula Plants
| Watering Guidelines | Description |
|---|---|
| Frequency | Regular and consistent watering |
| Soil Moisture | Keep soil moist, but not excessively wet |
| Check Soil Moisture | Use your fingers to check soil moisture before watering |
| Moisture Meter | Use a moisture meter for accurate soil moisture reading |
| Container Plants | Water every day or two, depending on weather and sunlight |
| Hot Summer Days | May need to water twice a day |
6. Ensuring Proper Light and Temperature Conditions
When it comes to growing calendula from seed, you need to make sure that you provide the right light and temperature conditions for the plants to thrive. Calendula prefers a lot of sunlight, so make sure to place your seeds in an area that receives at least 6–8 hours of sunlight a day.
When it comes to temperature, calendula likes warmer climates and thrives in temperatures between 60 and 70 degrees Fahrenheit.
If your area is prone to cold snaps, you should consider providing some kind of protection, such as a cold frame or covering the plants with a blanket or other covering.
Table: Light and Temperature Requirements for Calendula Plants
| Light and Temperature Requirements | Description |
|---|---|
| Sunlight | Calendula plants need at least 6-8 hours of sunlight daily |
| Temperature | Thrives in temperatures between 60 and 70 degrees Fahrenheit |
| Protection from Cold | Consider using a cold frame or covering plants during cold snaps |
7. How to Care for Calendula Plants
Caring for your calendula plants is essential for a successful harvest. After planting your seeds, you’ll need to water them regularly and provide adequate nutrients to ensure healthy growth. Here are some tips for watering and fertilizing your calendula plants:
Watering: Calendula plants prefer well-drained soil with regular and consistent watering. During the summer months, water your plants every other day, and in the winter, water them once a week. Maintaining adequate moisture in the soil is crucial, but it should not be excessively wet. Excessive watering may result in the growth of root rot.
Fertilizing: Fertilizing your calendula plants will provide essential nutrients and help them grow to their full potential. Use a balanced fertilizer or a mixture of compost and manure. Only fertilize your plants every few weeks, and always make sure the soil is moist before applying the fertilizer.
By following these tips for watering and fertilizing, you can ensure your calendula plants will have a successful growing season. With patience and proper care, you’ll be able to enjoy a beautiful harvest of homegrown calendula.
Table: Watering and Fertilizing Tips for Calendula Plants
| Caring for Calendula Plants | Description |
|---|---|
| Watering | Water every other day during summer and once a week during winter |
| Soil Moisture | Maintain adequate moisture, but not excessively wet |
| Fertilizing | Use a balanced fertilizer or a mixture of compost and manure |
| Fertilizing Frequency | Fertilize every few weeks when soil is moist |
| Preventing Root Rot | Avoid excessive watering, which may lead to root rot |
8. Dealing With Pests and Diseases
Pests and diseases can be a real problem for Calendula plants. Fortunately, there are some measures you can take to prevent and manage them. It’s important to watch out for any indications of pests or diseases, such as discolored leaves or spots on the plant’s leaves.
If you spot anything, act quickly! Remove any affected leaves, and apply an insecticidal soap or neem oil to help control the infestation. You should also make sure to keep the area around your plants free of debris and weeds, as they can harbor pests and diseases.
Finally, it’s important to give you give the Calendula plants the proper amount of water and fertilize them regularly, as having healthy plants can help prevent and control pests and diseases.
Table: Pest and Disease Prevention and Management for Calendula Plants
| Pest and Disease Management | Description |
|---|---|
| Indications of Pests or Diseases | Watch for discolored leaves or spots on leaves |
| Action to Take | Remove affected leaves and apply insecticidal soap or neem oil |
| Area Maintenance | Keep area around plants free of debris and weeds |
| Healthy Plants | Proper watering and fertilizing can prevent and control pests and diseases |
9. Harvesting and Storing Your Calendula
When it comes time to harvest your calendula, wait until the flowers are fully open. This is when they are most fragrant and have the highest medicinal value. Cut the stems just below the flower with a pair of scissors or pruning shears. You can also pull up the entire plant if you need a larger quantity of calendula.
Storing your harvested calendula is easy. Hang the stems upside down in a cool, dry place to dry out the flowers. Once dry, store the flowers in a sealed container in a dark, dry place. The flowers can be stored for up to a year. You can also store the flowers in the freezer for longer periods of time.
Once your calendula is dry, you can use it to make your own herbal remedies, teas, oils, and more. Enjoy your homegrown calendula and all the benefits it offers!
Table 5: Harvesting and Storing Guidelines for Calendula Plants
| Harvesting and Storing | Description |
|---|---|
| Harvesting Time | Harvest when flowers are fully open for maximum fragrance and medicinal value |
| Harvesting Method | Cut stems below the flower or pull up the entire plant |
| Storing Method | Hang the stems upside down in a cool, dry place to dry out flowers |
| Storage Container | Store the flowers in a sealed container in a dark, dry place |
| Shelf Life | Flowers can be stored for up to a year |
| Freezing Option | Flowers can be stored in the freezer for longer periods of time |
Conclusion
Congratulations on taking the time and effort to successfully grow calendula from seed! Now that your plants are flourishing, it’s time to enjoy the fruits of your labor. Calendula is a versatile flower with a range of uses, from adding a beautiful splash of color to your garden to providing healing properties for treating skin disorders and wounds.
You can enjoy your homegrown calendula in a variety of ways. For starters, you can use the flowers to create colorful and fragrant flower arrangements. If you’re interested in making your own potpourri, calendula adds a pleasant aroma.
You can also use the petals to add flavor to salads or as a garnish on other dishes. If you’re looking to get a bit more creative, calendula is also great for making herbal oils and ointments. The petals can be infused in oil or mixed with beeswax to make balms for treating skin ailments.
Additionally, calendula tea can be made from the dried petals, which can help with digestive issues, as well as soothe sore throats and reduce inflammation.
FAQs About Growing Calendula
How do I plant Calendula seeds?
Plant Calendula seeds outdoors in the spring after the last frost, or indoors 6-8 weeks before the last frost. Sow the seeds about 1/4 inch deep in well-draining soil, and keep the soil moist until the seedlings emerge.
How much water do Calendula plants need?
Calendula plants prefer consistent moisture but can tolerate some drought. Water deeply once or twice a week, depending on rainfall and soil moisture. To prevent foliar diseases, it is advisable to refrain from overhead watering.
When do Calendula plants bloom?
Calendula plants bloom from spring until fall in most climates. The first flowers usually appear in late spring or early summer, and blooming continues until frost in cooler climates.
How do I deadhead Calendula plants?
To encourage continued blooming, deadhead spent Calendula flowers regularly by pinching off the spent blooms near the base of the stem. This method will also prevent the plant from self-seeding and spreading too much.
How do I fertilize Calendula plants?
Calendula plants don’t require a lot of fertilizer, but you can feed them once a month with a balanced, water-soluble fertilizer. Avoid using high-nitrogen fertilizers, which can promote leaf growth over flower production.
What pests and diseases affect Calendula plants?
Common pests that can affect Calendula plants include aphids, spider mites, and whiteflies. Diseases that can affect Calendula plants include powdery mildew and leaf spot. Keep plants healthy and remove infected foliage promptly.
Can I grow Calendula in containers?
Yes, Calendula can be grown in containers as long as the container is at least 6 inches deep and has drainage holes. Use a good quality potting mix and water regularly to keep the soil moist but not waterlogged.
How do I propagate Calendula plants?
Calendula plants can be propagated by seed or by taking stem cuttings in the spring. To propagate by stem cuttings, take a 2- to 3-inch cutting from a healthy plant, remove the lower leaves, and plant the cutting in a pot with moist soil.
Related Post: 9 Best Potting Soil For Growing Herbs – Indoors And Outdoors