How to Grow Burdock from Seed: A Step-By-Step Guide!
In this blog post, we’ll be taking a step-by-step look at how to grow burdock from seeds. We’ll cover everything from preparing the soil to harvesting and storing the roots. So, let’s get started!
Table of Contents
- 1 What is Burdock, and Why Should We Grow It?
- 2 How to Grow Burdock from Seed
- 2.1 1. What You’ll Need to Get Started
- 2.2 2. How to Prepare the Soil for Planting Burdock Seeds
- 2.3 3. Where to Find Burdock Seeds and How to Store Them
- 2.4 4. When to Plant Burdock Seeds
- 2.5 5. Planting the Burdock Seeds
- 2.6 6. How to Properly Water and Fertilize the Soil
- 2.7 7. The Best Location to Plant Burdock
- 2.8 8. How to Transplant the Burdock
- 2.9 9. How to Care for the Burdock Once Planted
- 2.10 10. Pest Management for Burdock
- 2.11 11. Harvesting and Storing Burdock
- 2.12 12. Cooking with Burdock Roots
- 3 Conclusion: Enjoy the Harvest!
- 4 Author
What is Burdock, and Why Should We Grow It?
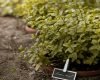
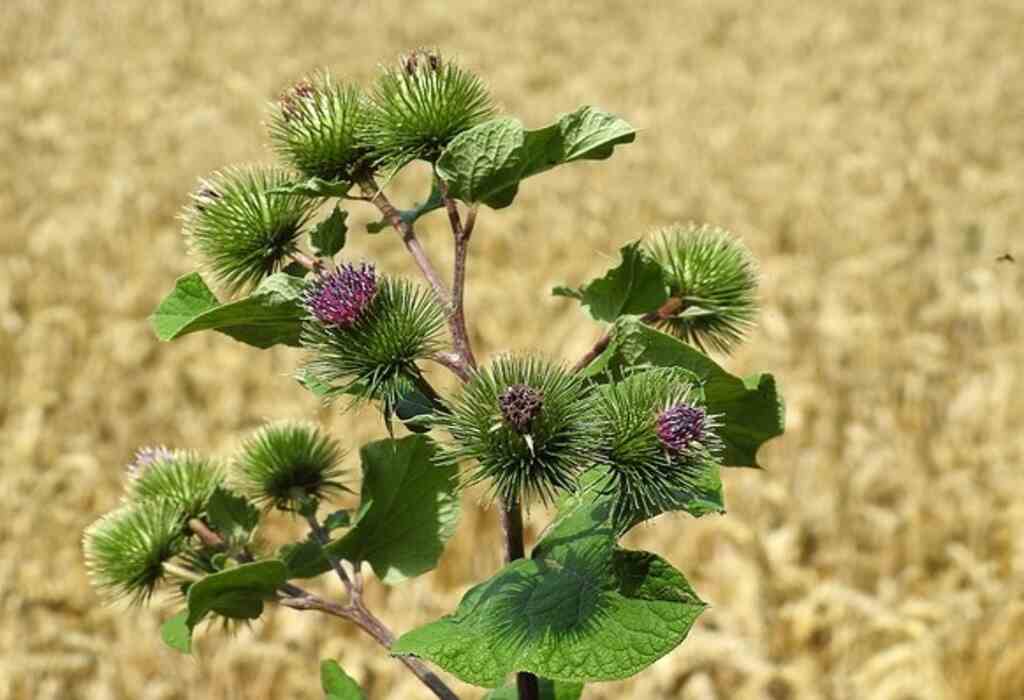
Hello everyone! Have you ever heard of burdock? Burdock is a root vegetable native to Europe and Asia that is beginning to gain popularity in the United States.
It has a mild, earthy flavor and a crunchy texture, making it a great addition to any meal. Burdock is also incredibly easy to grow, making it a great option for beginner gardeners.
How to Grow Burdock from Seed
1. What You’ll Need to Get Started
If you’re interested in growing your own Burdock, the good news is that you don’t need a lot of fancy equipment. All you need is some good quality soil, a spot to plant, and of course, Burdock seeds.
For the soil, you’ll want to make sure it’s well-drained, nutrient-rich, and has a pH level between 6.0 and 7.0. You’ll also need a container to plant the Burdock in, such as a pot or tray, as well as a watering can or hose to keep the soil moist.
Finally, you’ll need Burdock seeds to get started. These can be found in many gardening supply stores, or you can order them online.
Just make sure you buy fresh, viable seeds and store them in a cool, dry place until you’re ready to plant.
| Item | Description |
|---|---|
| Good quality soil | Well-drained, nutrient-rich, pH level between 6.0 and 7.0 |
| Container | Pot or tray to plant the Burdock seeds |
| Watering can or hose | To keep the soil moist |
| Burdock seeds | Fresh and viable seeds, found in gardening supply stores or ordered online |
2. How to Prepare the Soil for Planting Burdock Seeds
Preparing the soil for planting burdock seeds is an important step in the process of growing this wonderful plant. Burdock prefers a well-drained, loose soil that is rich in organic matter.
To achieve this type of soil, you will need to add a soil amendment such as compost or aged manure. You should also work in some organic fertilizer to ensure your burdock seeds get all the nutrients they need to grow.
Once you’ve amended the soil, you’ll want to rake it to make sure it is even and level. This will provide a good environment for your burdock seeds to germinate and grow. Additionally, you should make sure to remove any large rocks or debris from the soil before planting your seeds.
Finally, you’ll want to water the soil thoroughly. This will help ensure that your burdock seeds have the moisture they need to germinate and grow.
Once the soil is prepared, you’re ready to plant your burdock seeds and enjoy the harvest!
| Steps | Description |
|---|---|
| Add soil amendment | Compost or aged manure to achieve well-drained, loose soil rich in organic matter |
| Work in organic fertilizer | To provide all necessary nutrients for Burdock seeds to grow |
| Rake soil evenly | To create an optimal environment for germination and growth |
| Remove rocks and debris | To prevent any obstruction or damage to the seeds |
| Water soil thoroughly | To ensure that the seeds have enough moisture to germinate and grow |
3. Where to Find Burdock Seeds and How to Store Them
If you’re looking to grow burdock from seeds, you’ll need to start by finding the seeds themselves. Burdock seeds are widely available from gardening and seed stores, as well as online.
When you purchase your seeds, make sure to check the packaging to ensure that they are viable and have been stored properly. Once you’ve acquired the seeds, you’ll need to store them in a cool, dry place.
This will help to ensure that the seeds remain viable for longer. To maximize the life of your seeds, you can store them in a sealed container in the refrigerator.
This will help to keep them safe from any moisture or temperature fluctuations that may occur in your home.
| Topic | Description |
|---|---|
| Where to find Burdock seeds | Gardening and seed stores or online |
| Check packaging for viability | Make sure the seeds are viable and properly stored |
| Store seeds in cool, dry place | To keep them viable longer, in a sealed container in the refrigerator |
4. When to Plant Burdock Seeds
When it comes to planting burdock seeds, timing is everything! You should wait until the soil has warmed up to at least 65 degrees Fahrenheit and all danger of frost has passed.
This typically involves waiting until late spring or early summer. If you live in a warmer climate, you can plant the seeds earlier.
If you’re in a cooler climate, you may have to wait until late summer to sow your seeds. Make sure that you check the weather forecast and soil temperature before planting.
Burdock isn’t frost-tolerant, so planting too early could mean a failed crop.
| Planting time | Late spring or early summer after soil warms up to at least 65 degrees Fahrenheit and danger of frost has passed. In cooler climate, planting may need to wait until late summer. |
| Checking weather forecast and soil temp | To ensure the right planting time, avoid frost and achieve successful crop. |
| Frost tolerance | Burdock is not frost-tolerant. Planting too early could result in a failed crop. |
5. Planting the Burdock Seeds
Planting burdock seeds is a straightforward process that can easily be done by any gardener. First, you’ll need to prepare the soil by loosening it up and adding organic matter such as compost, manure or peat moss.
Then, you’ll want to lightly sprinkle the burdock seeds on top of the soil, giving them a little light covering of soil (no more than a quarter-inch). Once the seeds have been planted, you’ll want to lightly water the soil to ensure the seeds get the moisture they need to germinate.
Ensure that the soil remains moist but not waterlogged until the seeds begin to sprout. You may need to water the soil a few times a day in order for the seeds to germinate.
Once the seeds have germinated, you can reduce the amount of watering, but make sure the soil stays moist. With proper care, you should have healthy burdock plants in no time!
| Steps | Description |
|---|---|
| 1 | Prepare the soil by loosening it up and adding organic matter |
| 2 | Lightly sprinkle the burdock seeds on top of the soil |
| 3 | Cover the seeds with a little bit of soil |
| 4 | Lightly water the soil to ensure the seeds get the moisture they need |
| 5 | Keep the soil moist until the seeds begin to sprout |
| 6 | Reduce watering once the seeds have germinated |
| 7 | Care for the plants properly to ensure healthy growth |
6. How to Properly Water and Fertilize the Soil
Watering and fertilizing the soil is an integral part of growing burdock from seeds. Before you plant, make sure your soil is well-draining and contains plenty of organic matter. To ensure your soil is well-prepared, you can add a layer of compost or aged manure.
When it comes to watering, remember to give your burdock plants a deep drink of water each week. Be sure to water your plants at the soil level, avoiding getting the leaves wet, as this can lead to disease.
Fertilizing your burdock is also important. Once your plants are established, apply a balanced fertilizer every two to three weeks. Organic fertilizers are best, as they will help to improve the soil quality, which will in turn improve the health of your burdock plants.
By following these steps, you can ensure that you are properly watering and fertilizing your burdock plants. This will help them to thrive and bear the tasty roots that you can use in your cooking.
| Steps | Description |
|---|---|
| 1 | Ensure the soil is well-draining and contains plenty of organic matter |
| 2 | Water plants at the soil level, avoiding getting the leaves wet |
| 3 | Give plants a deep drink of water each week |
| 4 | Apply a balanced fertilizer every two to three weeks |
| 5 | Use organic fertilizers to improve soil quality |
7. The Best Location to Plant Burdock
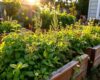
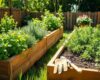
Once you’ve gathered all your supplies and prepared the soil for planting, the next step is to choose the best spot for your burdock. Burdock grows best in an area that receives partial shade, such as the north or east side of a building or wall.
It also prefers areas with moist soil, so look for spots that stay consistently damp. Avoid areas where water pools, as this can lead to root rot.
Burdock also needs plenty of space to spread out, as it can reach heights of up to six feet and have a spread of three feet. Planting in groups of two or more will give the burdock the best chance to thrive.
| Steps | Description |
|---|---|
| 1 | Choose an area that receives partial shade |
| 2 | Look for areas with consistently damp soil |
| 3 | Avoid areas where water pools |
8. How to Transplant the Burdock
Transplanting your burdock plants is a great way to ensure that they can grow and flourish in their new location. When it comes to transplanting, timing is key. Burdock does best when it is transplanted in the early stages of its growth, typically when the plants are about two inches tall.
To transplant your burdock, start by preparing the new location. Make sure the soil is loose and well-drained, as burdock prefers a neutral to slightly acidic soil. Dig a hole a few inches deep and wide enough to accommodate the root system of your burdock plant.
Next, gently remove the burdock plant from its original location, taking care not to damage the root system. Place the plant in the hole you prepared, and make sure the roots are covered by the soil.
Gently pat the soil down around the plant and water it. Water your transplanted burdock every few days and make sure the soil remains moist.
With proper care and attention, your transplanted burdock plants should thrive in their new location.
| Steps | Description |
|---|---|
| 1 | Prepare the new location |
| 2 | Dig a hole a few inches deep and wide enough for the root system |
| 3 | Gently remove the burdock plant from its original location |
| 4 | Place the plant in the hole |
| 5 | Cover the roots with soil |
| 6 | Pat the soil down around the plant |
| 7 | Water the transplanted burdock every few days |
9. How to Care for the Burdock Once Planted
Once you have planted the burdock seeds, it is important to properly care for them in order to ensure that they thrive and grow. Burdock plants need plenty of sunlight, water, and nutrients to survive.
Make sure to water your plants regularly during dry spells and fertilize them every three to four weeks to ensure that they get all the necessary nutrients. You should also weed the area around the plants to prevent competition from other plants.
Finally, you may have to protect your plants from pests and other animals by using a fence or other barriers. With the right care, your burdock plants will thrive, and you’ll be able to enjoy a bountiful harvest!
| Care Tips | Description |
|---|---|
| Watering | Water plants regularly during dry spells |
| Fertilizing | Fertilize every three to four weeks |
| Weeding | Remove weeds around the plants |
| Protection | Protect plants from pests and animals using barriers |
10. Pest Management for Burdock
Dealing with pests can be a hassle when it comes to growing any type of plant, and burdock is no exception. Fortunately, there are a few steps you can take to keep your burdock plants pest-free. The first step is to ensure that the soil around the plants is well-drained and not too wet.
This will help prevent the growth of fungi and other pests. Additionally, you should check the plants regularly for signs of damage, such as discoloration or wilting of leaves. If you notice any of these signs, you should take action right away to prevent the spread of pests to other plants.
You can also use an insecticidal soap or spray to get rid of any pests that may have already taken hold. Finally, make sure to keep the area around the plants clear of debris and weeds, as these can provide a home for pests.
With these simple steps, you can rest assured that your burdock plants will be safe from pests.
| Pest Control Tips | Description |
|---|---|
| Soil | Ensure soil is well-drained |
| Check plants regularly | Look for signs of damage and take action |
| Insecticidal soap/spray | Use insecticidal soap or spray to eliminate pests |
| Keep area clear | Keep the area around the plants clear of debris and weeds |
11. Harvesting and Storing Burdock
Harvesting and storing burdock is a relatively simple process. Depending on the size of the root, you will want to harvest them when they are about 3–4 inches long. Carefully dig around the roots to loosen them from the soil, and then carefully remove them.
The best time to harvest is in the early morning, when the soil is still moist. Once harvested, store the roots in a cool, dry place for up to two weeks.
To keep them from drying out, wrap the roots in damp newspaper or paper towel until you are ready to use them. With proper harvesting and storage, you can enjoy the delicious flavor of burdock for weeks to come.
| Steps | Description |
|---|---|
| Harvesting | Harvest when roots are about 3–4 inches long |
| Digging | Carefully dig around the roots to loosen them from the soil |
| Removing | Carefully remove the roots |
| Storing | Store the roots in a cool, dry place for up to two weeks |
| Wrapping | Wrap roots in damp newspaper or paper towel to prevent drying out |
12. Cooking with Burdock Roots
Cooking with Burdock roots is a great way to enjoy the bounty of your garden. Burdock has a unique flavor that can add a special touch to any dish. Burdock can be prepared in a variety of ways, from roasting and frying to boiling and stir-frying.
Roasting is a great way to bring out the flavor of the root, while boiling can help soften the texture and make it easier to add to other dishes. Stir-frying is also a great option and allows you to combine the root with other ingredients for a flavorful meal.
Burdock can also be eaten raw, but it can be tough to chew and should be cooked first. So don’t be afraid to experiment and find the perfect way to enjoy your fresh burdock roots!
| Cooking Methods | Description |
|---|---|
| Roasting | Brings out the flavor |
| Boiling | Softens the texture |
| Stir-frying | Combines the root with other ingredients |
| Raw | Can be eaten raw, but should be cooked first |
Conclusion: Enjoy the Harvest!
Congratulations! You’ve successfully grown a beautiful crop of burdock. With all the hard work you’ve put in, it’s time to enjoy the harvest! Burdock is an incredibly versatile vegetable that can be eaten raw, cooked, or pickled.
It can be enjoyed in salads, roasted, boiled, or even turned into a delicious tea. With its earthy flavor, burdock is a great addition to any meal. So, get cooking, and enjoy the harvest!
Related Post: How to Start a Herb Garden Indoors? (A Growers Guide)