
How To Grow Stevia From Seed: A Step-By-Step Guide!
Are you seeking a way to indulge your sweet cravings without consuming additional calories? Well, have you tried growing your own sweet stevia? Not only will you have a fresh and healthy alternative to sugar, but you’ll also have the satisfaction of growing your own plant!
In this article, we’ll cover the short answer for “How To Grow Sweet Stevia From Seed” and give you all the juicy details on how to successfully grow this delicious plant. Keep reading to become a stevia growing pro!
Table of Contents
- 1 How To Grow Stevia From Seed? Step By Step
- 1.1 1. What is Stevia, and why should you grow it from seed?
- 1.2 2. Gathering Supplies: What will you need to grow Stevia from seed?
- 1.3 3. Preparing the Soil: How to condition soil for optimal Stevia growth.
- 1.4 4. Sowing the Seeds: How to sow Stevia seeds correctly.
- 1.5 5. Watering: How to water Stevia correctly.
- 1.6 6. Fertilizing: What type of fertilizer to use and how often.
- 1.7 7. Pest Management: How to keep pests away from your Stevia crop.
- 1.8 8. Harvesting: When and how to harvest Stevia.
- 1.9 9. Storage: How to store your Stevia crop.
- 1.10 Troubleshooting guide for growing stevia from seed:
- 1.11 10. Conclusion: Wrapping up your Stevia-growing journey.
- 2 Author
How To Grow Stevia From Seed? Step By Step
1. What is Stevia, and why should you grow it from seed?
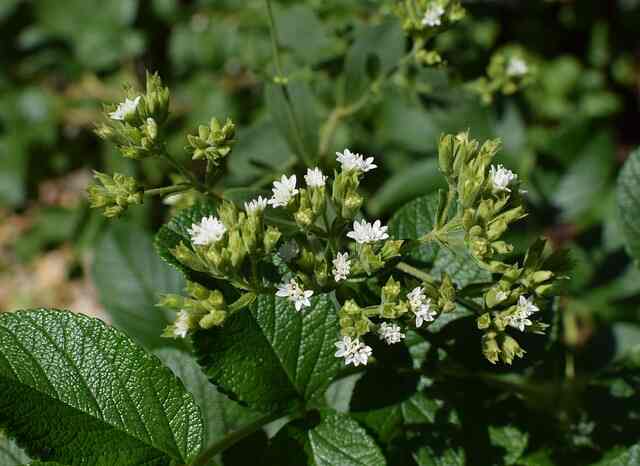
Stevia is an incredibly sweet-tasting herb that is native to South America. It has been used for centuries as a natural sweetener and has recently become popular as an alternative to processed sugar.
Growing Stevia from seed is a great way to enjoy the sweet taste of Stevia on a regular basis. Not only does it allow you to have a steady supply of Stevia on hand, but it also gives you the satisfaction of growing your own food.
Furthermore, it presents an excellent opportunity to reduce your expenses on groceries. Growing Stevia from seed is easy to do and doesn’t require a lot of space. With the right supplies and a little bit of patience, you’ll be well on your way to harvesting your own sweet Stevia crop.
| Information | Details |
|---|---|
| Plant Name | Stevia |
| Origin | South America |
| Use | Natural sweetener |
| Benefits | Alternative to processed sugar, easy to grow, saves money on grocery bill |
2. Gathering Supplies: What will you need to grow Stevia from seed?
Growing sweet stevia from seed requires a few supplies. You’ll need some stevia seeds, a pot or container with drainage holes, potting soil, fertilizer, and water. For the pot or container, you can either use plastic, clay, or metal.
Make sure the pot or container is big enough to hold the growing Stevia plant. For the potting soil, make sure to use a mix that is specifically made for growing plants. You’ll also need fertilizer to help the plant grow.
A general-purpose fertilizer should work well. Finally, you’ll need to keep the soil moist throughout the growing process. To do this, use a watering can or spray bottle to water the soil.
With these supplies in hand, you’re ready to start growing your sweet stevia from seed!
| Supplies | Details |
|---|---|
| Stevia seeds | Required |
| Pot or container with drainage holes | Required |
| Potting soil | Required |
| Fertilizer | Required |
| Water | Required |
| Plastic, clay, or metal pot or container | Optional |
3. Preparing the Soil: How to condition soil for optimal Stevia growth.
Preparing the soil is an essential step in growing sweet stevia from seed. Before sowing your seeds, you’ll need to condition the soil to make sure it has the right nutrients for optimal growth.
The best way to do this is to mix in plenty of organic matter, such as compost or aged manure, as well as a general-purpose fertilizer. This will ensure that your stevia plants have a nutrient-rich environment to grow in.
Furthermore, it is crucial to maintain the soil’s moisture level without making it excessively wet. To accomplish this, you can add a layer of mulch to help retain moisture.
Finally, make sure your soil is well-draining to prevent root rot. With the right soil preparation, your stevia plants will have a great start on their journey to becoming sweet, flavorful treats.
| Steps | Details |
|---|---|
| Mix in organic matter | Compost or aged manure |
| Add general-purpose fertilizer | Required |
| Keep soil moist | Not soggy |
| Add mulch | Helps retain moisture |
| Ensure soil is well-draining | Prevents root rot |
4. Sowing the Seeds: How to sow Stevia seeds correctly.
When it comes to sowing Stevia seeds, it’s important to get it right. Fortunately, it’s not too difficult! Firstly, you’ll need to wait until the soil has been properly conditioned and is at the right temperature. This should be between 65°F and 75°F. If it’s too cold, your seeds won’t germinate.
Once everything is ready, you’ll need to scatter the tiny Stevia seeds on the surface of the soil. Don’t bury them! Instead, just lightly press them into the soil. Make sure to space them out evenly, and water the area with a light mist.
Once the seeds have germinated, make sure to thin out the seedlings. This means removing some of the weaker plants to give the larger ones more room to grow. You should also mulch to keep the soil moisture and temperature consistent, and protect the plants from weeds.
By following these steps, you’ll be able to successfully sow Stevia seeds and get ready to watch your crop grow!
| Steps | Details |
|---|---|
| Wait for proper soil temperature | 65°F to 75°F |
| Scatter seeds on soil surface | Don’t bury |
| Lightly press seeds into soil | Required |
| Space seeds out evenly | Required |
| Water with a light mist | Required |
| Thin out seedlings | Remove weaker plants |
| Mulch | Helps retain moisture and temperature, protects from weeds |
5. Watering: How to water Stevia correctly.
Watering is an important part of growing Stevia from seed. You’ll want to give your plants just enough water so that the soil is moist but not soggy. Too much water can cause the roots to rot and the leaves to discolor.
The best way to water your plants is to use a watering can or a soaker hose. Make sure to water the soil, not the leaves, and to water the plants until the top few inches of soil are moist.
Be sure to check the soil moisture regularly and adjust your watering technique accordingly. You can also add mulch around the plants to help retain moisture in the soil.
| Steps | Details |
|---|---|
| Watering can or soaker hose | Required |
| Water soil, not leaves | Required |
| Soil should be moist, not soggy | Required |
| Check soil moisture regularly | Required |
| Adjust watering technique | Required |
| Add mulch | Helps retain moisture in soil |
6. Fertilizing: What type of fertilizer to use and how often.
When it comes to fertilizing your Stevia plants, it’s important to choose the right type of fertilizer and know how often to fertilize. The best type of fertilizer for Stevia is a slow-release organic fertilizer, such as a granular fertilizer or a liquid fertilizer.
Make sure you follow the instructions on the package and only use the amount of fertilizer recommended. Generally, it’s best to fertilize the plants every month or two during the growing season.
It’s also a good idea to add a bit of compost or manure to the soil every now and then to help the plants grow even better.
| Information | Details |
|---|---|
| Best type of fertilizer | Slow-release organic fertilizer |
| Examples | Granular fertilizer, liquid fertilizer |
| Follow instructions on package | Use recommended amount |
| Frequency | Fertilize every month or two during growing season |
| Additional soil amendment | Add compost or manure to soil |
7. Pest Management: How to keep pests away from your Stevia crop.
When it comes to keeping pests away from your Stevia crop, there are a few steps you can take to ensure a healthy harvest. First, you’ll want to make sure you’re planting Stevia in an area with good air circulation to help prevent fungal diseases.
You can also use mulch to help keep weeds away and provide added protection. Additionally, you may want to consider using insecticidal soap spray or neem oil to help control any pests that may be attracted to your plants.
Finally, if you notice any signs of pests, be sure to take action right away to prevent spread. With a little bit of effort and attention, you can keep your Stevia crop free from pests and enjoy your sweet harvest.
| Steps | Details |
|---|---|
| Good air circulation | Plant in an area with good air circulation |
| Mulch | Use mulch to keep weeds away and provide added protection |
| Insecticidal soap or neem oil | Use insecticidal soap spray or neem oil to control pests |
| Take action right away | If you notice signs of pests, take action right away |
8. Harvesting: When and how to harvest Stevia.
Harvesting Stevia is a relatively simple process – but it’s important to know when to do it for the best results. The best time to harvest Stevia is when the leaves and stems are still tender, typically when the plant is 4 to 6 inches tall.
Make sure to harvest the plant before it flowers, as this will give you the sweetest flavor. When you’re ready to harvest, simply cut the entire plant off at the base of the stem. Make sure to wear gloves, as the leaves can be a bit prickly!
After harvesting, you can immediately use the leaves fresh or dry them for later use. To dry them, simply spread the leaves out on a baking sheet or tray and allow them to air dry. After they have dried completely, keep them in a cool and dry location inside an airtight container.
| Steps | Details |
|---|---|
| Best time to harvest | When leaves and stems are still tender, typically when plant is 4 to 6 inches tall |
| Harvest before flowering | Gives sweetest flavor |
| Cut entire plant off at base of stem | Wear gloves |
| Use fresh or dry | Spread out leaves to air dry, then store in airtight container in cool, dry place |
9. Storage: How to store your Stevia crop.
When it comes to storing your Stevia crop, you want to make sure you do it correctly. After all your hard work, you don’t want to waste your efforts by not storing it properly. The best way to store your Stevia crop is to dry it out in a cool, dark, and dry area.
It is also possible to keep it in the freezer for extended periods of time. Make sure that you keep it away from moisture and light, as both of these can cause the Stevia to spoil. Once the Stevia is completely dry, you can seal it in airtight containers for further protection.
Keep in mind that the longer you store it, the more it will lose its flavor, so you should use it as soon as possible. With the proper storage methods, you can ensure that your Stevia crop will stay fresh and flavorful for a long time.
| Steps | Details |
|---|---|
| Dry out in cool, dark, and dry area | Best way to store |
| Freezer | Can also store in freezer for long-term storage |
| Keep away from moisture and light | Both can cause Stevia to spoil |
| Seal in airtight containers | For further protection |
Troubleshooting guide for growing stevia from seed:
Problem: Low Germination Rate
Solution: Stevia seeds have a relatively low germination rate. To improve your chances, start with fresh seeds, plant them in a well-draining soil mix, and keep them moist but not waterlogged. Additionally, keep the soil temperature between 20-25°C (68-77°F), and provide plenty of light for 12-16 hours per day.
Problem: Damping-off Disease
Solution: Damping-off is a fungal disease that attacks young seedlings and causes them to wilt and die. To prevent this, use a sterile potting mix, water from the bottom, and avoid overcrowding the seedlings. Good air circulation and proper ventilation will also help prevent the disease.
Problem: Slow Growth or Stunted Plants
Solution: Stevia plants require warm temperatures and lots of sunlight to grow well. If your plants are slow to grow or stunted, ensure they are getting at least 6 hours of direct sunlight per day and that the soil temperature is between 20-25°C (68-77°F). Additionally, make sure you’re not overwatering or fertilizing the plants.
Problem: Pests
Solution: Stevia plants can attract aphids, whiteflies, and other pests. In order to manage these pests, employing insecticidal soap or neem oil spray would be advisable. It is recommended to refrain from utilizing chemical pesticides since they have the potential to cause harm to helpful insects and pollinators.
Problem: Flowering too soon
Solution: Stevia plants tend to flower early in their growth cycle, which can impact the sweetness of the leaves. To prevent early flowering, pinch off the top of the plant when it reaches a height of 6-8 inches. This will encourage bushier growth and delay flowering.
By following these troubleshooting tips, you should be able to successfully grow stevia from seed. Remember, it’s important to be patient and give your plants the care and attention they need to thrive.
| Problem | Solution |
|---|---|
| Low germination rate | Start with fresh seeds, plant in well-draining soil mix, keep moist but not waterlogged, maintain soil temperature between 20-25°C (68-77°F), provide plenty of light for 12-16 hours per day |
| Damping-off disease | Use sterile potting mix, water from bottom, avoid overcrowding seedlings, ensure good air circulation and proper ventilation |
| Slow growth or stunted plants | Ensure plants get at least 6 hours of direct sunlight per day |
10. Conclusion: Wrapping up your Stevia-growing journey.
Congratulations! You have reached the end of your Stevia-growing journey, and you can now enjoy the fruits of your labor. You have learned how to grow Stevia from seed, prepare the soil, sow the seeds, water, fertilize, manage pests, harvest, and store your crop.
With a bit of patience, dedication, and the right know-how, you can have a thriving Stevia crop in your garden. Growing Stevia from seed is a rewarding and fun experience that can provide you with a plentiful harvest of sweet, low-calorie nourishment.
Now that you have the knowledge to produce your own Stevia, why not give it a try? Good luck and happy growing!
Related Posts:
- Growing Herbs in Pots For Beginners: Expert Advice!
- 9 Best Potting Soil For Growing Herbs – Indoors And Outdoors