How to Grow Basil Indoors: Benefits and Essential Tips!
Growing basil at home provides an abundant supply of fresh, aromatic foliage that elevates culinary dishes directly from your windowsill or garden. Cultivating this classic Mediterranean herb indoors or on patios delivers potent medicinal antioxidants alongside exceptional kitchen flavor.
Achieving vigorous growth requires a precise understanding of ambient temperature, light exposure, and root biology. Implementing proven botanical methods transforms simple seedlings into prolific, multi-branched culinary powerhouses.
Variety Selection and Core Differences
Selecting the proper cultivar depends on your available space and culinary goals. While sweet Genovese represents the global standard for pesto, unique regional varieties offer distinct chemical profiles and structural growth habits.
Different cultivars demonstrate distinct morphological traits:
– Sweet Genovese delivers classic large, cup-shaped leaves with high concentrations of eugenol and linalool
– Thai basil produces rigid purple stems with spicy, anise-scented foliage suited for high-heat cooking
– Greek Bush basil forms a compact, spherical canopy with miniature leaves ideal for tight indoor containers
– Dark Opal provides deep anthocyanin-rich purple foliage that functions as both an edible herb and an ornamental centerpiece
Gardeners often assume all basil types tolerate the same climatic conditions. Thai varieties tolerate tropical humidity far better than Mediterranean broadleaf types, which quickly succumb to mildew under poor ventilation.
Location and Soil Setup
Lighting serves as the primary engine for high essential oil production. Your plants require at least six to eight hours of direct sunlight daily, or fourteen hours under full-spectrum LED fixtures delivering adequate photosynthetic active radiation.
For indoor container cultivation, you must use a loose, premium soilless potting mix and strictly avoid dense native topsoil or loam. Heavy garden soil compacts tightly inside containers, suffocating fragile feeder roots and triggering anaerobic fungal decay.
Maintain a highly aerated substrate blueprint where organic compost or worm castings never exceed 40 percent of total volume to protect the delicate root architecture from salt bogs and compaction. Use these precise volumetric ratios to fill your indoor pots:
- 40 percent high-grade sphagnum peat moss or coco coir for structural moisture distribution.
- 30 percent coarse horticultural perlite or pumice to guarantee maximum drainage channels.
- 20 percent mature organic compost or worm castings for sustainable mineral delivery.
- 10 percent coarse horticultural quartz sand to provide root-anchoring weight.
Ensure the target substrate pH remains balanced strictly between 6.0 and 7.0 to optimize trace nutrient bioavailability.
Spacing and Planting Guidelines
Crowding seedlings is the fastest pathway to stagnant airflow and fungal blights like downy mildew. Provide sufficient lateral clearance so that moisture rapidly evaporates from leaf surfaces after watering cycles.
Follow these structural planting dimensions for optimal vegetative development:
- Plant individual seeds one-quarter inch deep in pre-moistened germination media.
- Maintain eight to twelve inches of lateral space between outdoor garden specimens.
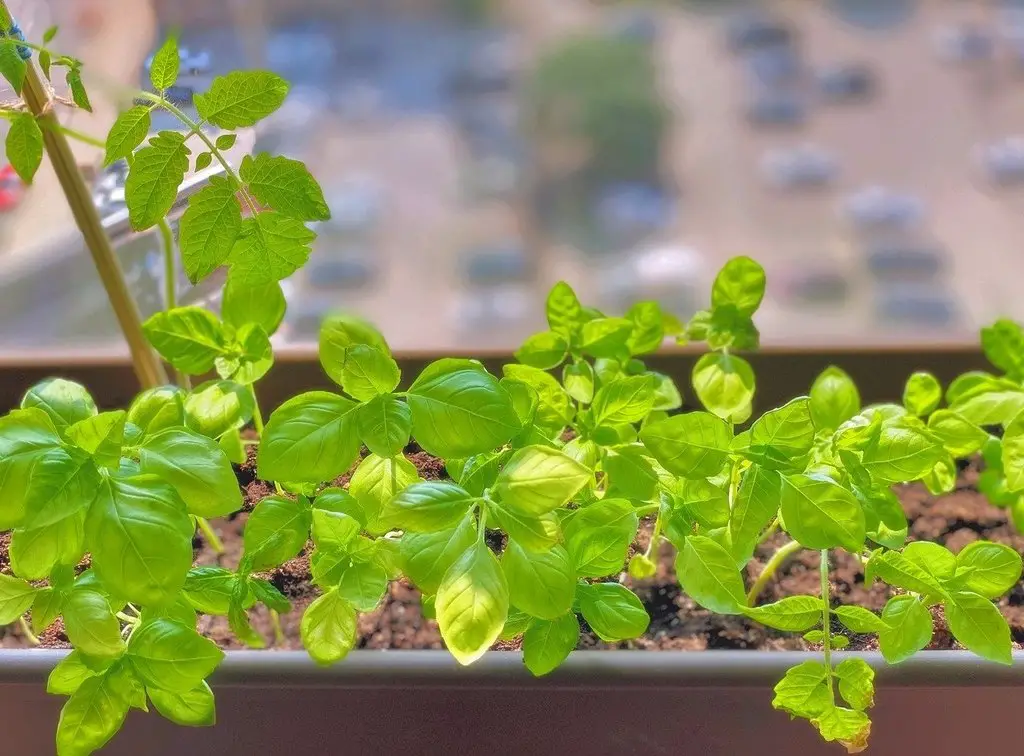
- Allocate a minimum container depth of 8 to 10 inches and a pot volume of at least one gallon per individual indoor plant to give the root framework ample room to descend.
- Ensure ambient room temperatures remain consistently between 65 and 80 degrees Fahrenheit.
A valuable backyard hack involves separating multi-sown supermarket pots. Commercial growers plant dozens of seeds per pot for a lush appearance; gently washing away the media and potting single stems individually yields dozens of vigorous plants.
Watering and Nutritional Protocols
Basil requires consistent moisture but detests waterlogged substrate. Water deeply only when the top inch of potting media feels dry to the touch, and empty drainage saucers immediately to prevent root suffocation.
Over-fertilization represents a widespread mistake that ruins culinary quality. Excessive nitrogen causes rapid, watery leaf expansion while drastically reducing the concentration of aromatic essential oils.
Adhere to these precise nutritional and irrigation parameters:
- Apply a balanced, water-soluble organic fertilizer diluted to half strength every three weeks
- Irrigate exclusively at the soil base or utilize bottom-watering to keep foliage dry
- Flush the potting medium with clean water monthly to prevent toxic fertilizer salt buildup
- Stop feeding entirely during low-light winter dormancy periods
Harvesting and Storage
Proper harvesting technique directly dictates the future productivity of the plant. Always prune stems directly above a set of leaf nodes using sharp, sterilized shears; this forces dormant lateral buds to develop into two new central branches.
Harvest leaves early in the morning when essential oil reserves reach their biological peak. Immediately wash the fresh harvest thoroughly and dry the leaves completely with a salad spinner or paper towels to eliminate soil-borne bacteria before storage.
Follow these professional preservation protocols to maintain maximum leaf quality:
- Store fresh cut stems upright in a glass of room-temperature water like fresh-cut flowers
- Avoid refrigerating raw, unwrapped leaves because temperatures below 45 degrees Fahrenheit cause rapid enzymatic blackening
- Freeze whole clean leaves immersed in extra virgin olive oil inside ice cube trays for long-term culinary preservation
- Pinch off emerging terminal flower spikes immediately to prevent the leaves from turning bitter and woody