How to Grow Lavender in Pots: Easy Grower’s Guide!
Unlocking the secret of how to grow lavender in pots allows any homeowner to cultivate a highly aromatic, therapeutic Mediterranean oasis right on their sunny balcony or patio. While standard field plantings require vast expanses of sandy land, container cultivation offers the unique advantage of complete environment control, making it a highly rewarding endeavor for apartment dwellers and suburban homesteaders alike. Forcing this arid-loving perennial into a targeted container space lets you micromanage its drainage and light exposure parameters with absolute precision.
Achieving success with potted lavender requires a complete departure from traditional houseplant care habits, as this species naturally thrives on structural restriction and minimal moisture. By choosing the correct compact cultivar and masterfully engineering a gritty, alkaline growing substrate, you can enjoy a massive seasonal canopy of vibrant purple blooms. Mastering the baseline container rules detailed below guarantees a robust, long-lived herbal plant that continuously fills your living space with its iconic soothing fragrance.
1. Variety Selection and Core Differences
Selecting the exact genetic strain before finalizing your layout dictates the overall survival and floral output of your container-bound crop. Lavender species vary dramatically in mature dimensions, cold hardiness, and moisture tolerance profiles across the genus Lavandula.
English lavender (Lavandula angustifolia) cultivars like Munstead and Hidcote are highly recommended best-practice choices for pots due to their naturally compact, slow-growing habits and intense oil concentrations. Conversely, French lavender (Lavandula dentata) and Spanish lavender (Lavandula stoechas) produce highly dramatic, ornamental blooms but display a much lower tolerance for cold winter drafts.
Understanding the core physiological limitations of large varieties prevents devastating overcrowding mistakes later in the season. Massive agricultural cultivars like Provence or Grosso can easily reach three feet in height and width, making them entirely unsuited for standard residential containers.
Backyard growers on online horticultural discussion boards frequently warn that trying to restrict giant field-grown varieties to small pots chokes the roots, compromises inner airflow, and invites quick physical decline. Sourcing compact, premium dwarf cultivars ensures your potted setup builds a dense, highly productive floral architecture that naturally fits your space boundaries.
- English lavender dwarf cultivars handle container boundaries perfectly while delivering the highest culinary oil quality.
- Spanish and French varieties offer unique aesthetics but require strict overwintering protection in northern zones.
- Giant intermediate hybrids must be strictly avoided in container gardens because their massive root systems split standard pots.
Potted Lavender Cultivation Matrix
Essential variables for maintaining healthy, long-lived lavender plants in container setups.
| Growing Factor | Target Metric / Setting | Actionable Container Strategy | Why It Saves Your Plant |
|---|---|---|---|
| 🪴 Pot Selection | 12 – 16″ Unglazed Terracotta |
Porous Walls + Open Drainage Holes
Choose a wide, shallow terracotta container over plastic. Ensure it has multiple open drainage holes and sits elevated on pot feet instead of directly in a flat saucer.
|
Terracotta breathes naturally, allowing moisture to wick out of the sides to prevent stagnant water logs.
|
| 🪨 Soil Alchemy | pH 6.7 – 7.3 | 30% Grit Ratio |
Potting Mix + Perlite/Sand + 1 Tbsp Lime
Blend a lean matrix using 70% basic potting soil and 30% coarse horticultural sand or perlite. Mix in one tablespoon of dolomite lime per container.
|
Replicates Mediterranean limestone soils and drains immediately, preventing fungal root rot.
|
| 💧 Moisture Control | Drought Mimicry Routine |
Deep Soak, Then Full Air-Dry
Water deeply until streams run completely out of the base, then withhold all moisture until the top two inches of soil feel bone-dry.
|
Prevents drowning fragile roots while honoring the natural arid cycle lavender requires to produce essential oils.
|
| ❄️ Overwintering | Unheated Garage / Straw Wrap |
Insulate the Soil Column Below 32°F
Move pots into an unheated garage or enclose them in a straw bale ring before hard freeze cycles. Provide a light drink once a month on warm days.
|
Protects roots from severe above-ground freezing winds that crack pots and dehydrate fine tissue.
|
2. Location and Soil Setup
Creating an ideal foundation for a potted Mediterranean perennial demands an unyielding stance on substrate physics. Since container gardening is explicitly specified here, you must explicitly advocate for a loose, premium soilless potting mix and strictly forbid the use of native topsoil or loam inside the pots.
Utilizing standard garden dirt inside container pots causes lethal soil compaction, destroying drainage channels and suffocating the root system over a single rainy week. A highly porous, professional soilless matrix ensures continuous oxygen circulation around the root base, which is an absolute mandatory biological requirement for this crop.
Location placement requires an uncompromised solar quota to activate the intense production of volatile essential oils within the leaf tissue. Position your arranged pots in a permanent outdoor location that receives a strict minimum of six to eight hours of direct daily sunlight.
A widespread myth shared across beginner social media pages suggests that lavender can flourish indoors on a standard dark room desk. Real-world testing logs reveal that indoor placement invariably leads to rapid etiolation, weak stems, and an absolute failure to produce flowers due to insufficient solar radiation.
- Blend a custom gritty mix using 50 percent premium soilless potting mix, 40 percent coarse horticultural sand, and 10 percent perlite.
- Incorporate one tablespoon of agricultural limestone into the mix to maintain an optimal alkaline pH level between 7.0 and 8.0.
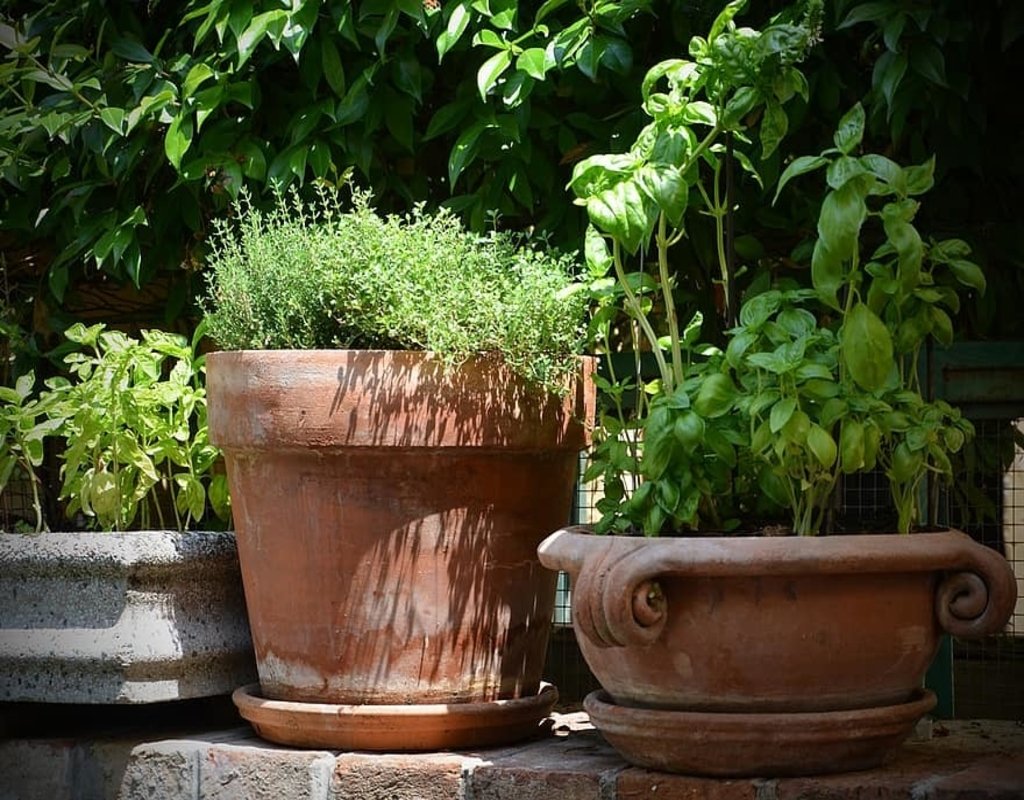
- Utilize unglazed terracotta or clay pots measuring 12 to 16 inches in diameter to allow the porous walls to breathe naturally.
3. Spacing and Planting Guidelines
Implementing rigid spatial boundaries and following correct seed biology rules protects your container garden from sudden crop failure. If you are starting from seed, treat cold stratification as a highly recommended best practice rather than an absolute strict requirement, as fresh premium seeds can sprout without it albeit more erratically.
Chilling your seed packet in a refrigerator for three weeks mimics natural winter conditions and significantly increases your overall germination uniformity. When sowing, remember that tiny lavender seeds require direct light exposure to break dormancy and must be surface-sown completely uncovered.
Real-world testing logs from online planting communities reveal that novice growers routinely make the critical failure of crowding multiple starter plants into a single shared container. Lavender acts as a solitary root system that demands its own dedicated air zone to prevent severe canopy crowding and subsequent mildew outbreaks.
An unorthodox backyard hack shared by organic enthusiasts involves placing a single piece of broken pottery over the drainage hole before filling, completely replacing the harmful myth of throwing a loose layer of gravel at the bottom.
- Sowing steps require pressing the fine seeds gently onto the damp substrate surface without adding a topsoil layer.
- Space individual starter pots at least 18 inches apart on your balcony to ensure unobstructed horizontal wind flow.
- Set the crown of the plant exactly level with the soil line, leaving one inch of space at the pot rim for watering.
- Avoid using indoor plastic humidity domes once sprouts emerge to protect fragile seedlings from damping-off disease.
4. Watering and Nutritional Protocols
Managing irrigation cycles inside isolation pots requires extreme restraint to mimic the natural arid environments of the Mediterranean region. This woody perennial vastly prefers deep, infrequent moisture applications over daily shallow sprinkles, meaning you must allow the container to dry out significantly.
Deliver water directly at the base of the main stem using a long-necked watering can, keeping the upper foliage completely dry. Wetting the dense crown of lavender leaves creates a stagnant, humid microclimate that rapidly invites destructive root decay and powdery mildew.
You must practice extreme nutritional restraint, as over-fertilizing is the fastest way to ruin an otherwise healthy lavender plant. Applying heavy synthetic nitrogen fertilizers forces rapid, weak, and flavorless cellular expansion that drastically dilutes the essential oil concentration in the flower buds.
Instead, skip commercial liquid feeds entirely and top-dress the perimeter with a thin two-inch layer of pure sand or white chicken grit early in the spring. This natural mulch layer serves a dual purpose by suppressing weed emergence and reflecting bright sunlight back up into the lower canopy.
- Provide a deep irrigation session strictly when a digital moisture meter confirms the top three inches of substrate are bone dry.
- Never allow the container saucer to hold standing water, as stagnant moisture triggers fatal crown rot within 48 hours.
- Avoid all high-nitrogen fertilizers to force the plant to focus its biological energy on dense, highly resinous purple blooms.
5. Harvesting and Storage
Frequent, strategic harvesting serves as your ultimate tactical pruning tool to maintain a compact canopy shape and prevent the lower stems from turning woody. For peak therapeutic and culinary potency, cut the flower spikes early in the morning right after the morning dew evaporates but before intense afternoon heat dissipates the volatile oils.
Choose stems where the very first lower blossoms are just beginning to open while the upper buds remain tightly closed. Never prune back into the old, leafless woody sections of the branch, as the plant cannot regenerate fresh growth from dead wood.
Before initializing any culinary preservation or curing methods with your fresh harvest in the kitchen, you must strictly follow proper food safety sanitation guidelines. You are explicitly commanded to thoroughly wash the fresh blossoms under cold water to eliminate any ambient dust or debris.
Dry the leaves and flowers completely using a salad spinner or clean paper towels to eliminate all surface moisture before storing, as packing wet foliage invites rapid bacterial mold. An expert culinary processing method involves layering the completely dry blooms between generous scoops of coarse sea salt to create an exquisite finishing salt.
- Cut individual stems exactly two inches above the main woody intersection using sharp, sterilized bypass pruners.
- Wipe your micro-tip pruning tools down with isopropyl alcohol before and after your harvesting routine to prevent disease.
- Dry your standard harvest by hanging bundled stems upside down in a dark, well-ventilated room for ten to fourteen days.
- Store fully cured, brittle lavender blossoms inside airtight glass mason jars kept away from direct light.