How to Grow Garlic at Home: Full Beginner’s Guide!
Learning how to grow garlic transforms an ordinary kitchen garden into a source of unbeatable culinary flavor. With just a few premium seed cloves and a sunny location, you can harvest massive bulbs straight from your backyard soil. Cultivating this crop provides a massive return on investment for small spaces. You plant a single clove in autumn and harvest an entire bulb the following summer.
This comprehensive grower guide covers every essential step required to plant, maintain, cure, and store your crop successfully. Following precise planting depths and balanced watering protocols ensures an abundant harvest of premium alliums. A dedicated approach to these botanical requirements rewards you with dense, flavorful cloves that surpass anything found in a commercial grocery store.
Variety Selection and Core Differences
Choosing the right seed stock dictates the success of your entire seasonal harvest. You must select a strain that genetically aligns with your specific winter climate and culinary goals. Standard commercial garlic often fails in backyard gardens because it lacks regional adaptation. Furthermore, grocery store bulbs are frequently sprayed with chemical growth inhibitors that permanently stunt root development.
Hardneck strains thrive in regions with cold winters and harsh freezing temperatures. These robust varieties produce a central flowering stalk called a scape; this provides an incredible early summer culinary bonus when trimmed. Homesteading forums consistently emphasize that hardneck varieties offer complex, spicy flavor profiles but feature a shorter shelf life of about four to six months.
Conversely, softneck varieties perform exceptionally well in warmer southern climates with mild winters. These plants do not produce a rigid central stalk, making their flexible stems perfect for creating traditional braided garlic ropes. Softneck strains yield a higher number of smaller cloves per bulb and boast an impressive storage life of up to nine months under optimal conditions.
Location and Soil Setup
Garlic requires a location that receives a minimum of six to eight hours of direct, unfiltered sunlight daily. Proper site selection prevents fungal diseases and ensures the plants generate enough energy to form large, robust bulbs. Your soil structure must provide excellent drainage while retaining just enough moisture to support active root growth.
Creating the perfect soil environment requires a precise structural blueprint to prevent root rot. You must start with a primary structural baseline of native loam or quality topsoil. Organic amendments are crucial for allium development, but compost and aged manure combined must never exceed 40 percent of the total soil volume. Too much organic matter creates a soggy environment that suffocates the basal plate of the clove.
Many beginner gardening boards propagate the myth that you can plant garlic in pure compost for maximum size. This is a dangerous misconception that ignores actual soil physics; pure compost retains excessive water and causes the dormant cloves to rot before spring arrives. An ideal, scientifically sound soil mixture includes:
- 65 percent native loam or sandy topsoil
- 25 percent fully finished organic compost
- 10 percent coarse agricultural sand for drainage
Spacing and Planting Guidelines
Planting timing relies entirely on the arrival of your first hard frost. You should plant your cloves approximately four to six weeks before the ground freezes solid. This window allows the seed to establish a strong subterranean root system before entering a mandatory period of winter dormancy. This chilling period, known as vernalization, requires temperatures below 40 degrees Fahrenheit for at least six weeks to trigger proper bulb division.
Veterans on backyard vegetable subreddits highly recommend a specific preplanting hack to eliminate hidden pathogens. Soak your separated cloves in a solution of water, baking soda, and liquid kelp for twelve hours, followed by a ten minute dip in isopropyl alcohol just before planting. This unorthodox method destroys microscopic mites and fungal spores while giving the roots an immediate nutritional boost.
Proper spacing directly determines the final size of your harvested bulbs. Crowded plants compete aggressively for nutrients, resulting in stunted, unusable yields. Follow these strict industry standard dimensions for maximum growth:
- Separate the bulb into individual cloves right before planting
- Plant each clove exactly 2 to 3 inches deep in the soil
- Place the clove with the flat root side facing down and the pointed tip facing up
- Space individual cloves exactly 6 inches apart in the row
- Space parallel rows exactly 10 to 12 inches apart
Watering and Nutritional Protocols
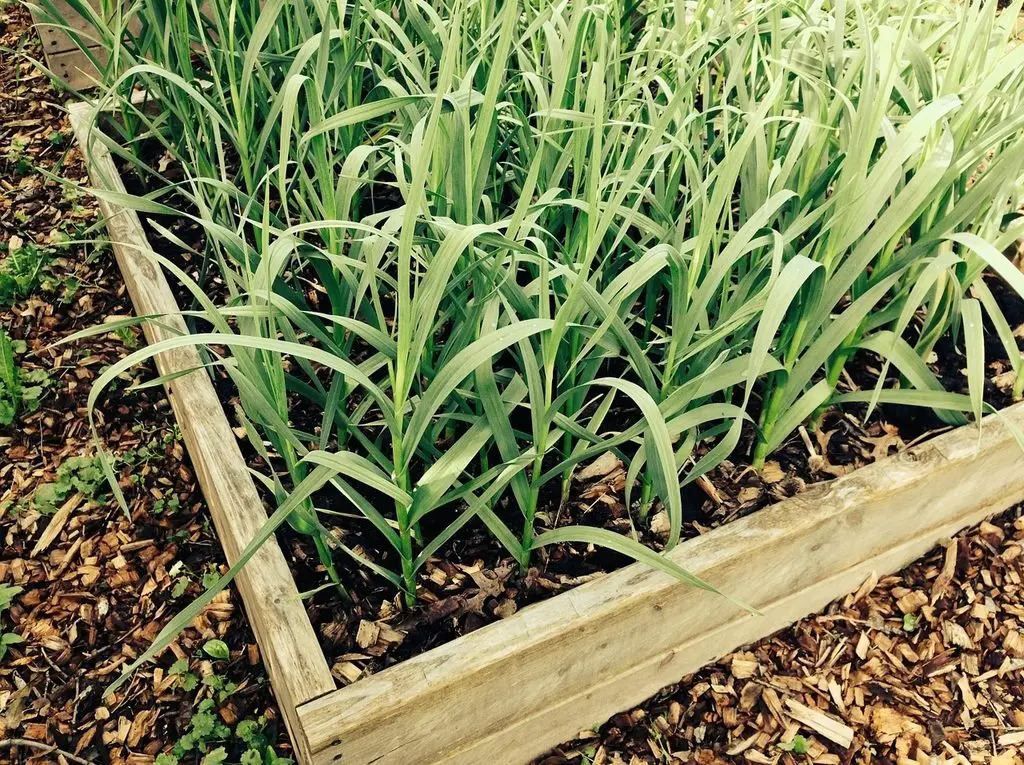
Garlic is a surprisingly heavy feeder that demands consistent moisture and specific macronutrients during its active spring growth phase. Once the green shoots emerge through the winter mulch, the plants require about one inch of water per week. You must water deeply at the base of the plant to encourage downward root expansion rather than shallow surface watering.
Nitrogen is the most critical nutrient for developing the large vegetative leaves that eventually power bulb formation. Top dress your rows with a high nitrogen organic fertilizer, such as blood meal or feather meal, early in the spring season. You must stop applying any nitrogen heavy fertilizers by late spring, or the plant will prioritize leaf growth over bulb development.
Managing moisture at the end of the season requires careful observation of the plant foliage. Dedicated allium growers on regional farming message boards advise cutting off all irrigation exactly two to three weeks before your target harvest date. Withholding water forces the plant to dry down its protective papery wrappers. This crucial dry period prevents soil pathogens from infiltrating the mature bulb.
Harvesting and Storage
Timing your harvest correctly prevents the bulbs from splitting open in the ground. You should begin lifting the plants when the bottom three to four leaves turn completely brown, while the upper leaves remain green. Carefully loosen the soil beneath the bulbs with a digging fork; pulling them directly by the fragile stems will cause the stalks to snap.
Never wash your freshly harvested garlic with water, as introducing moisture invites immediate fungal decay. Instead, gently brush off the loose dirt and move the plants directly into a dry, heavily shaded environment with maximum airflow. The curing process takes approximately three to four weeks. Curing allows the residual energy in the leaves to draw down into the bulb while the outer skins harden into a protective shell.
Once fully cured, trim the roots to a quarter inch and cut the stalks about one inch above the bulb. For a truly expert culinary method, save the earlier trimmed green scapes from your hardneck varieties and dehydrate them completely.
Grind these dried scapes in a food processor to create a vibrant, potent garlic scape powder that elevates any winter soup or roasted vegetable dish. Store your finished bulbs in a wire basket or mesh bag at room temperature in a dark pantry.