How to Grow Cuban Oregano From Seeds (Growers Guide)

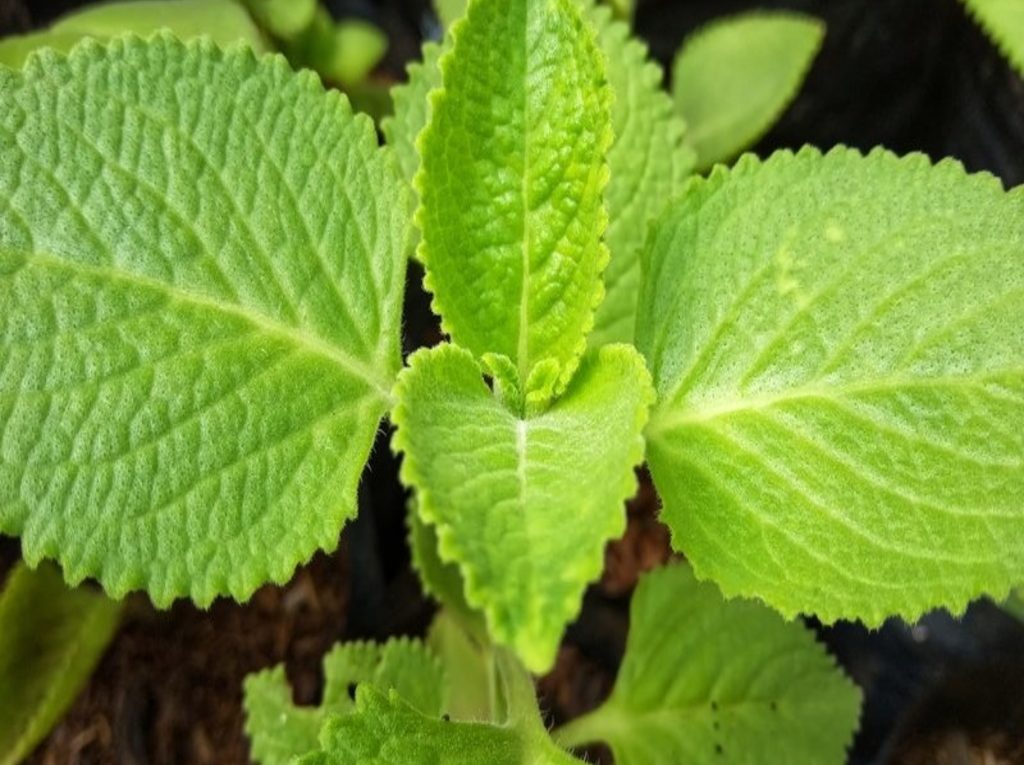
Curious about starting herbs from scratch? Learning how to grow Cuban oregano from seeds (Growers Guide) offers a rewarding way to connect with this aromatic, velvety-leaved plant right from the beginning. While many gardeners rely on cuttings, growing Cuban oregano from seed lets you witness the full life cycle and enjoy the satisfaction of nurturing it from its earliest stage to a thriving, flavorful herb.
Table of Contents
- 1 Why Grow Cuban Oregano From Seeds?
- 2 Step 1: Collecting and Preparing Cuban Oregano Seeds
- 3 Step 2: Sowing Cuban Oregano Seeds
- 4 Step 3: Germination and Early Care
- 5 Step 4: Hardening Off and Transplanting
- 6 Step 5: Growing Conditions for Healthy Cuban Oregano
- 7 Step 6: Maintenance, Pruning, and Harvest
- 8 Troubleshooting Common Issues
- 9 Frequently Asked Questions
- 10 Conclusion
- 11 Author
Why Grow Cuban Oregano From Seeds?
Benefits of Seed Propagation
Starting Cuban oregano from seeds brings several advantages beyond the typical propagation methods. Seed-grown plants exhibit greater genetic diversity, which can lead to subtle variations in flavor, aroma, and even leaf shape. This diversity can make your herb garden more resilient to pests and diseases. Additionally, seeds allow you to grow a larger number of plants at once, making it ideal for those who want to fill garden beds or share seedlings with friends. The process also offers a sense of accomplishment, as you witness the transformation from tiny seed to mature, aromatic herb.
Challenges to Consider
Despite its rewards, growing Cuban oregano from seeds presents some challenges. Seeds may take longer to germinate and establish compared to cuttings, requiring patience and attentive care. Germination rates can be unpredictable, with some seeds failing to sprout due to age or environmental factors. Proper temperature, humidity, and light are crucial for successful germination, and neglecting these can lead to disappointment. However, with careful planning and attention, these challenges can be overcome, resulting in healthy, vibrant plants that enrich your garden and kitchen.
Step 1: Collecting and Preparing Cuban Oregano Seeds
Harvesting Seeds
To harvest Cuban oregano seeds, wait until the plant’s flower spikes have fully matured and dried on the stem. The flowers will turn brown and brittle, signaling that the seeds are ready for collection. Gently snip the dried flower spikes and hold them over a clean, dry surface such as a tray or piece of paper. Carefully rub or shake the spikes to release the tiny seeds, which can be mixed with bits of dried flower. Take your time to separate the seeds from the chaff, ensuring you only keep the healthiest, most mature seeds for planting. Allow the seeds to air dry for a few days to prevent mold during storage.
Seed Storage Tips
Proper seed storage is essential for maintaining viability and ensuring successful germination when you’re ready to plant. Place the thoroughly dried seeds in a labeled envelope, small paper packet, or airtight glass jar. Store your seeds in a cool, dark, and dry location, such as a pantry or refrigerator, to prolong their shelf life. Avoid exposure to moisture, heat, or direct sunlight, which can degrade the seeds and reduce germination rates. For best results, use your Cuban oregano seeds within a year, as older seeds may have diminished vitality and lower success rates.
Step 2: Sowing Cuban Oregano Seeds
Choosing the Right Soil
Selecting the appropriate soil is crucial for starting Cuban oregano seeds off strong. Opt for a high-quality, sterile seed-starting mix that is light, fluffy, and drains well. This type of mix minimizes the risk of soil-borne diseases and provides the delicate roots with the oxygen and moisture they need to thrive. Avoid using heavy garden soil or compost at this stage, as these can retain too much water and harbor pathogens that may harm young seedlings. Pre-moisten the seed-starting mix before sowing to create an ideal environment for germination.
Sowing Technique
When sowing Cuban oregano seeds, gently scatter them across the surface of the prepared, moist seed-starting mix. Because these seeds are quite small, take care not to bury them too deeply-cover with no more than 1/8 to 1/4 inch of soil, as they require some light to trigger germination. Use a fine mist spray bottle to moisten the surface, ensuring the seeds remain in place and the soil stays evenly damp. If you’re sowing in trays, space the seeds about an inch apart to give each seedling room to develop without overcrowding.
Optimal Germination Conditions
Cuban oregano seeds germinate best in warm, humid environments with plenty of indirect light. Maintain a consistent soil temperature between 70°F and 75°F (21°C–24°C) using a seedling heat mat if necessary. Cover the seed tray with a clear plastic dome or loosely draped plastic wrap to create a mini greenhouse effect, which helps retain moisture and warmth. Place the tray in a bright spot, such as near a sunny window, but avoid direct sunlight, which can overheat and dry out the seeds. Check the soil daily, misting as needed to keep it evenly moist but never soggy.
Step 3: Germination and Early Care
Germination Timeline
Under optimal conditions, Cuban oregano seeds typically sprout within 10 to 14 days, though some may take a bit longer. During this period, it’s important to maintain consistent moisture and warmth, as fluctuations can delay or inhibit germination. Once you notice tiny green shoots emerging from the soil, remove the plastic cover to improve air circulation and reduce the risk of fungal diseases. Continue to monitor the seedlings closely, ensuring they receive gentle, indirect light and that the soil remains lightly moist as they develop their first sets of true leaves.
Thinning and Transplanting Seedlings
As your seedlings grow and develop two or more sets of true leaves, it’s time to thin them out to prevent overcrowding and competition for resources. Select the healthiest, most vigorous seedlings and gently remove the weaker ones, either by snipping them at soil level or carefully transplanting them to another container. Allow the remaining seedlings to continue growing until they are sturdy and several inches tall, with at least four true leaves. At this stage, they are strong enough to be transplanted into individual pots or directly into the garden, where they’ll have more space to flourish.
Step 4: Hardening Off and Transplanting
Hardening Off Process
Before moving your Cuban oregano seedlings outdoors permanently, it’s essential to acclimate them to the harsher, variable conditions outside. Begin the hardening off process by placing the seedlings outdoors in a sheltered, shady spot for just a couple of hours each day. Gradually increase their exposure to sunlight, wind, and temperature fluctuations over the course of 7 to 10 days. This gradual transition toughens up the plants, reducing transplant shock and helping them adjust to their new environment. Be sure to bring them back inside or cover them if nighttime temperatures dip below 60°F (16°C).
Transplanting Guidelines
Once your seedlings are hardened off and nighttime temperatures are reliably warm, it’s time to transplant them to their final growing location. Choose a spot in your garden or a container that receives at least 6 to 8 hours of sunlight daily, with some afternoon shade in hot climates to prevent leaf scorch. Prepare the soil by loosening it and amending with compost if needed. Space the plants 12 to 18 inches apart to allow for their bushy growth habit and to promote good airflow, which helps prevent disease. Plant each seedling at the same depth as it was in the seed tray, gently firming the soil around the roots and watering thoroughly to settle them in.
Step 5: Growing Conditions for Healthy Cuban Oregano
Sunlight Requirements
Cuban oregano thrives in bright conditions, ideally receiving partial to full sun throughout the day. In regions with intense afternoon heat, providing some shade during the hottest hours can help prevent leaf burn and keep the plant looking lush. Indoors, place your Cuban oregano near a sunny window or under a grow light to ensure it receives enough light for strong, compact growth. Insufficient light can lead to leggy, weak plants with fewer leaves and diminished flavor, so always prioritize good lighting for the healthiest results.
Soil and Watering
Well-draining soil is essential for Cuban oregano, as its succulent leaves are prone to rot in overly wet conditions. Amend garden beds with sand or perlite if necessary to improve drainage, and always use pots with drainage holes if growing in containers. Water the plant when the top inch of soil feels dry to the touch, being careful not to overwater. During hot, dry spells, you may need to water more frequently, but always allow the soil to dry out slightly between waterings. Mulching around the base of the plant can help retain moisture and suppress weeds.
Temperature and Humidity
Cuban oregano prefers warm temperatures, performing best between 70°F and 90°F (21°C–32°C). Protect your plants from chilly drafts and sudden temperature drops, as they are sensitive to cold and can suffer damage if exposed to frost. If you live in a cooler climate, consider growing Cuban oregano in containers that can be brought indoors during the winter months. While the plant appreciates moderate humidity, it can tolerate drier conditions if watered consistently. Avoid misting the leaves directly, as excess moisture can encourage fungal issues.
Step 6: Maintenance, Pruning, and Harvest
Fertilizing
Although Cuban oregano is not a heavy feeder, providing it with occasional nutrients can encourage vigorous growth and lush foliage. Use a balanced, water-soluble fertilizer diluted to half strength once a month during the active growing season, typically spring through early fall. Avoid over-fertilizing, as this can lead to excessive, weak growth and diminish the plant’s characteristic flavor. If you notice yellowing leaves or stunted growth, check for root-bound conditions or poor soil quality before increasing fertilizer applications.
Pruning for Bushiness
Regular pruning is key to maintaining a compact, bushy Cuban oregano plant. Pinch back the growing tips every few weeks to stimulate branching and prevent the plant from becoming leggy or sprawling. If the plant begins to flower, promptly remove the flower spikes to redirect energy back into leaf production, which is what you’ll be harvesting. Pruning also helps improve air circulation within the plant, reducing the risk of fungal diseases and keeping your Cuban oregano looking healthy and attractive.
Harvesting Leaves
Once your Cuban oregano plant is well established and has plenty of lush foliage, you can begin harvesting leaves for culinary use. Use clean, sharp scissors or your fingers to snip off leaves or small stems, always leaving several leaves on each stem to support continued growth. Harvest in the morning, when the leaves are most flavorful and aromatic. Frequent, light harvesting encourages the plant to produce more leaves, ensuring a steady supply for your kitchen throughout the growing season.
Troubleshooting Common Issues
| Problem | Likely Cause | Solution |
|---|---|---|
| Poor germination | Old seeds, low temp | Use fresh seeds, maintain warmth |
| Leggy seedlings | Insufficient light | Move to brighter location |
| Yellow leaves | Overwatering | Allow soil to dry between waterings |
| Wilting | Underwatering | Increase watering frequency |
Growing Cuban oregano from seeds can occasionally present challenges, but most issues are easily resolved with attentive care. If seeds fail to sprout, it may be due to old or improperly stored seeds, or temperatures that are too low for germination. Leggy, weak seedlings are often a sign of insufficient light and can be corrected by moving them to a brighter spot or providing supplemental lighting. Yellowing leaves typically indicate overwatering, so check your soil’s moisture and adjust your watering routine. Conversely, wilting plants may simply need more frequent watering, especially during hot, dry weather.
Frequently Asked Questions
Can I grow Cuban oregano indoors?
Absolutely! Cuban oregano adapts well to indoor environments, provided it receives plenty of bright, indirect sunlight and is kept in a warm, draft-free spot. Using a grow light can help supplement natural light during the darker winter months.
How long does it take to grow Cuban oregano from seed to harvest?
From sowing to the first harvest, Cuban oregano typically takes about 2 to 3 months, depending on growing conditions and care. Seedlings grow steadily once established, and regular harvesting encourages even more leaf production.
Is Cuban oregano different from regular oregano?
Yes, Cuban oregano is botanically distinct from Mediterranean oregano. It belongs to the mint family and features thick, succulent leaves with a much stronger, more pungent flavor. Its unique taste and texture make it a favorite in Caribbean and Asian cuisines.
Conclusion
Growing Cuban oregano from seeds is a fulfilling journey that allows you to experience every stage of this remarkable herb’s life. By carefully harvesting and preparing seeds, providing the ideal conditions for germination, and tending to your plants with attention and care, you’ll be rewarded with a thriving, aromatic addition to your garden or kitchen. Whether you’re an adventurous gardener or a culinary enthusiast, starting Cuban oregano from seed is a gratifying way to expand your horizons and enjoy the freshest, most flavorful leaves possible. With patience and dedication, your efforts will yield a lush, vibrant plant that enhances both your landscape and your cooking.