
How to Grow Chives at Home? A Simple Growers Guide!

Looking for an easy-to-grow herb that adds fresh flavor to any dish? Chives are the perfect choice for beginners and seasoned gardeners alike. If you’re wondering how to grow chives at home, the secret lies in sunlight, well-draining soil, and a few simple care tips. With the right setup, you’ll have a steady supply in no time. Here’s how to get started.
Table of Contents
- 1 Why Grow Chives at Home?
- 2 What Are Chives?
- 3 Benefits of Growing Chives
- 4 Choosing the Right Location
- 5 Soil Preparation and Requirements
- 6 How to Plant Chives
- 7 Watering, Mulching, and Fertilizing
- 8 Ongoing Care and Maintenance
- 9 Harvesting Chives
- 10 Propagating and Dividing Chives
- 11 Common Problems and Solutions
- 12 Frequently Asked Questions
- 13 Expert Tips for Success
- 14 Conclusion
- 15 Author
Why Grow Chives at Home?
Chives are an incredibly versatile and easy-to-grow herb that can elevate both your cooking and your garden’s aesthetic. Their slender, grass-like leaves add a subtle onion flavor to a wide array of dishes, from salads and soups to omelets and baked potatoes. Beyond their culinary uses, chives are a beautiful addition to any garden, producing vibrant purple flowers that attract bees and butterflies, supporting local pollinator populations.
Chives are also remarkably resilient and require little maintenance, making them perfect for those new to gardening or anyone looking to add a low-effort, high-reward plant to their home. Whether you have a sprawling backyard or just a sunny windowsill, chives can thrive and provide fresh, homegrown flavor year-round.
What Are Chives?
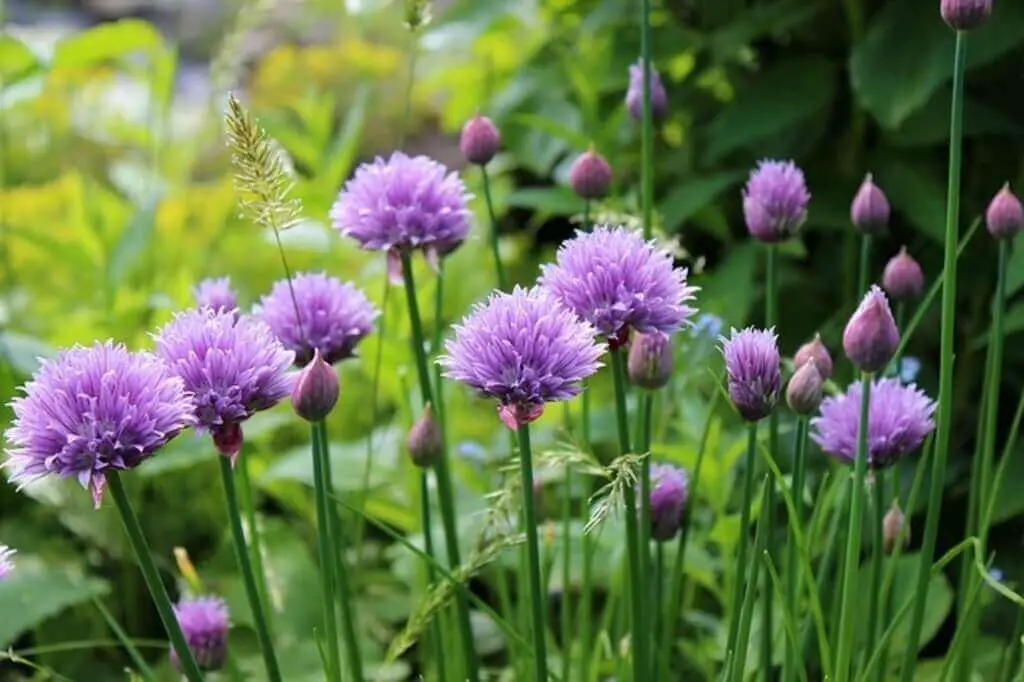
Chives (Allium schoenoprasum) are a perennial herb belonging to the same family as onions, garlic, and leeks. Characterized by their thin, hollow, green leaves, chives grow in dense clumps and can reach up to 30 centimeters (about 12 inches) tall. In late spring to early summer, they produce striking round clusters of purple-pink flowers, which are also edible and make a delightful garnish.
Chives are prized for their mild, onion-like flavor, which is less pungent than that of their relatives. Both the leaves and flowers can be used in cooking, offering a delicate taste and a splash of color. Their compact growth habit makes them suitable for garden beds, borders, and containers, fitting seamlessly into any growing space.
Benefits of Growing Chives
Nutritional and Culinary Value
Chives are not just a tasty addition to meals; they are also packed with nutrients that benefit your health. They contain significant amounts of vitamins A and C, which support immune function and skin health, as well as minerals like calcium and potassium. The antioxidants present in chives help protect your body from free radicals, contributing to overall wellness.
In the kitchen, chives are incredibly versatile, lending a subtle onion flavor to dishes without overpowering other ingredients. Their delicate leaves can be snipped fresh and sprinkled over eggs, potatoes, soups, and salads, while their edible flowers add a mild onion taste and a burst of color to any plate.
Garden Benefits
Chives offer more than just culinary rewards-they are also valuable allies in the garden. Their nectar-rich flowers attract bees, butterflies, and other beneficial pollinators, supporting the health and productivity of your garden ecosystem. Chives are known to deter common pests such as aphids and carrot flies, making them a natural companion plant for vegetables like carrots, tomatoes, and lettuce. Their compact size means they don’t compete aggressively for space, allowing you to tuck them into tight spots, containers, or even window boxes. With minimal effort, chives can enhance both the productivity and beauty of your garden.
Choosing the Right Location
Sunlight Needs
To ensure your chives thrive, it’s important to choose a location that meets their light requirements. Chives perform best when they receive at least six hours of direct sunlight each day, which encourages robust growth and abundant flowering. While they can tolerate partial shade, especially in hotter climates, too little light may result in spindly plants and reduced flavor. If you’re growing chives indoors, place them on a south- or west-facing windowsill where they’ll get plenty of natural light. If sunlight is limited, consider supplementing with a grow light to keep your chives healthy and productive all year long.
Soil Preparation and Requirements
Soil Characteristics
Chives are adaptable but will produce the best results in soil that is fertile, moist, and well-draining. Before planting, enrich your garden bed with plenty of organic matter, such as compost or well-rotted manure, to improve fertility and structure. This helps retain moisture while preventing water from pooling around the roots, which can lead to rot. If you’re growing chives in containers, select a high-quality potting mix that contains organic material and drains well. Avoid heavy, clay soils or those prone to waterlogging, as these conditions can stunt growth and make plants susceptible to disease.
Soil pH
Chives prefer a neutral to slightly acidic soil, with an optimal pH range between 6.0 and 7.0. If you’re unsure of your soil’s pH, consider testing it with a simple home kit. Adjust the pH as needed by adding lime to raise it or sulfur to lower it. Proper pH ensures that chives can absorb the nutrients they need, resulting in healthier, more flavorful plants.
How to Plant Chives
Planting from Seed
Growing chives from seed is a rewarding process that allows you to start with a clean slate. Indoors, sow seeds about 6-8 weeks before the last expected frost. To begin you will want to purchase trays, sterilized seed mix, and chives seeds. You can find these on Amazon. Fill small pots or seed trays with a light, seed-starting mix, and scatter the seeds thinly across the surface. Cover them with a thin layer of vermiculite or soil, mist gently with water, and keep them in a warm, bright location.
Germination typically takes 10-14 days. Once seedlings reach about 10 centimeters (4 inches) tall and have several leaves, harden them off by gradually exposing them to outdoor conditions before transplanting them to the garden or larger pots. Outdoors, sow seeds directly into prepared soil in spring, spacing them about 15-30 centimeters (6-12 inches) apart to allow room for mature clumps.
Planting Young Plants
For a quicker start, purchase young chive plants from a nursery or garden center. Transplant them into your garden or containers in spring or early summer, spacing each plant 15-30 centimeters (6-12 inches) apart. Dig holes slightly larger than the root balls, place the plants at the same depth they were growing in their pots, and firm the soil around them. Water thoroughly after planting to help them settle in and establish strong roots.
Container Growing
Chives adapt well to container life, making them ideal for patios, balconies, or indoor windowsills. Choose a pot at least 30 centimeters (12 inches) wide and deep, with drainage holes to prevent waterlogging. Fill with a rich, organic potting mix, and plant seeds or young chive plants as described above. Place the container in a sunny spot and water regularly, as pots dry out faster than garden beds. Container-grown chives are easy to move to follow the sun or bring indoors during cold weather.
Herbs grow great in all types of pots. Some of the most popular are terracotta, plastic, resin, metal and ceramic. If you’re new to herb gardening, you may want to start with self watering pots. These pots water your plants whenever it’s needed, making it easier for the beginner.
I personally use the Classic Garden Planters for my Rosemary plants. You can find both of these products on Amazon.
Watering, Mulching, and Fertilizing
Watering
Chives prefer consistently moist soil but dislike being waterlogged. Water your chive plants regularly, especially during dry spells or when growing in containers, where soil dries out more quickly. Aim to keep the soil evenly moist, but allow the top inch to dry out between waterings to prevent root rot. Early morning watering is best, as it allows foliage to dry before nightfall, reducing the risk of fungal diseases.
Mulching
Applying a layer of organic mulch, such as compost, straw, or shredded leaves, around your chive plants helps retain soil moisture, suppress weeds, and regulate soil temperature. Mulching also adds nutrients to the soil as it breaks down, supporting healthy, vigorous growth. In addition, mulch can protect chive roots from temperature extremes, making it especially beneficial in both hot and cold climates.
Fertilizing
Chives are not heavy feeders, but a little extra nutrition goes a long way. At planting time, mix compost or a slow-release organic fertilizer into the soil. During the growing season, feed your chives with a diluted liquid fertilizer or compost tea every 4-6 weeks, especially if you are harvesting frequently. Avoid over-fertilizing, as this can lead to lush foliage with less flavor and increased susceptibility to pests.
Ongoing Care and Maintenance
Weeding
Keeping the area around your chive plants free of weeds is essential for healthy growth. Weeds compete for water, nutrients, and light, which can weaken your chives and reduce yields. Hand-pull weeds regularly or use a hoe to gently cultivate the soil, being careful not to disturb the shallow roots of your chive plants. Mulching also helps minimize weed growth, making maintenance easier.
Pruning
Regular harvesting acts as a natural form of pruning, encouraging your chives to produce new, tender leaves. If you notice flower stalks forming, you can remove them to direct more energy into leaf production, unless you want to enjoy the edible blooms. After the flowering season, cut back the entire clump to about 5 centimeters (2 inches) above the soil. This rejuvenates the plant and stimulates a flush of fresh, green shoots.
Dividing Clumps
As chive clumps mature, they can become crowded, leading to reduced vigor and smaller leaves. Every 2-3 years, divide your chive plants in early spring or fall. Dig up the clump, separate it into smaller sections with several bulbs and leaves each, and replant them at the appropriate spacing. Dividing not only revitalizes your chives but also provides you with new plants to expand your herb garden or share with friends.
Harvesting Chives
How and When to Harvest
Once your chive plants are well established and at least 15 centimeters (6 inches) tall, you can begin harvesting. Use sharp scissors or garden shears to snip leaves close to the base, taking care not to cut more than one-third of the plant at a time. This allows the plant to recover and continue producing new growth. Regular harvesting encourages the development of tender, flavorful leaves and prevents the plant from becoming tough or woody.
Edible Flowers
Chive flowers are not only beautiful but also edible, with a mild onion flavor that makes them a unique addition to salads, soups, and garnishes. Harvest the flowers when they are fully open and vibrant in color. You can use them whole as a decorative touch or separate the tiny florets to sprinkle over dishes. Allowing some flowers to remain on the plant can also attract pollinators and add ornamental value to your garden.
Propagating and Dividing Chives
Division
Dividing chives is the most reliable way to propagate new plants and maintain the health of your existing clumps. In early spring or fall, carefully dig up a mature chive clump using a garden fork or spade. Gently separate the clump into smaller sections, ensuring each division has a good number of bulbs and healthy leaves. Replant these divisions immediately in prepared soil or containers, water well, and keep the soil moist until they establish. Dividing not only rejuvenates older plants but also allows you to expand your herb garden or share chives with friends and neighbors.
Seed Collection
If you prefer to grow chives from seed, allow some of the flower heads to mature and dry on the plant. Once the flowers turn brown and papery, cut them off and shake out the tiny black seeds. Store the seeds in a cool, dry place until you’re ready to sow them the following season. Seed propagation is a simple way to produce large numbers of new plants, although it takes longer for seedlings to reach harvestable size compared to divisions.
Common Problems and Solutions
| Problem | Cause | Solution |
|---|---|---|
| Yellowing leaves | Overwatering or drought | Adjust your watering schedule; ensure soil drains well and avoid letting the soil dry out completely or become waterlogged. |
| Poor growth | Poor soil or crowding | Improve soil with compost; divide overcrowded clumps and replant in fresh soil to give each plant enough space and nutrients. |
| Fungal diseases | Excess moisture, poor air flow | Water at the base of the plant, avoid wetting the leaves, and thin out dense clumps to improve air circulation and reduce humidity. |
| Aphids | Pests | Spray plants with a strong jet of water to dislodge aphids, encourage natural predators like ladybugs, or use insecticidal soap if infestations persist. |
Chives are generally hardy and trouble-free, but keeping an eye out for these common issues will help ensure your plants remain healthy and productive. Good cultural practices, such as proper watering, spacing, and regular maintenance, go a long way in preventing most problems.
Frequently Asked Questions
Can I grow chives indoors year-round?
Absolutely! Chives are one of the best herbs for indoor gardening. Place them in a sunny spot, such as a south-facing window, and water regularly to keep the soil moist but not soggy. If natural light is limited, supplement with a grow light to ensure healthy, vigorous growth. With proper care, you can enjoy fresh chives all year long, even in the depths of winter.
How often should I divide chive clumps?
To keep your chive plants healthy and productive, divide them every 2-3 years. Over time, clumps can become crowded and less vigorous, so lifting and separating them helps rejuvenate growth. Early spring or fall is the best time for division, and the process is simple and rewarding, giving you more plants for your garden or to share with friends.
Are chive flowers edible?
Yes, chive flowers are not only edible but delicious! Their mild onion flavor and attractive appearance make them a wonderful garnish for salads, soups, and other dishes. You can use the whole flower head or separate the individual florets for a more delicate presentation. Chive flowers also attract pollinators, adding both beauty and ecological value to your garden.
Expert Tips for Success
- Remove flower buds if your primary goal is to harvest leaves, as flowering can slow down leaf production. However, if you enjoy the ornamental value and edible blooms, let some flowers develop.
- Water regularly, especially in hot weather or when growing chives in containers, as they dry out faster than garden beds. Consistent moisture keeps the leaves tender and flavorful.
- Use chives fresh for the best flavor. While you can dry or freeze them, fresh chives offer a more vibrant taste and texture. Snip leaves as needed, and add them to dishes at the end of cooking to preserve their delicate flavor.
- Rotate your chive plants every few years to prevent soil-borne diseases and maintain healthy growth. This is especially important if you’re growing chives in the same spot year after year.
Conclusion
Growing chives at home is a straightforward and highly rewarding experience that brings fresh flavor and beauty to your kitchen and garden. With just a little care and attention, you can enjoy a continuous supply of this delicious herb, whether you have a large garden, a small balcony, or a sunny windowsill. Chives are easy to plant, simple to maintain, and offer a wealth of culinary and ecological benefits. By following these expert tips and best practices, you’ll ensure a thriving patch of chives that will enhance your meals and brighten your home for years to come. Happy growing!